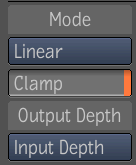
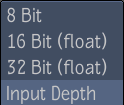
The Remap Color tool lets you view High Dynamic Range (HDR) images on a limited dynamic range display, such as a computer monitor. You can also use the Remap Color tool as a 1D LUT tool to remap an image's color output using interactive histogram and color curve tools.
For more information on 1D LUTs, see Applying LUTs.
To remap the color of an image:


| Mode: | Use: | To: |
|---|---|---|
| Linear | In Min and In Max | Set the minimum and maximum input color values in the image. |
| Out Min and Out Max | Set the minimum and maximum output color values in the image. | |
| Gamma | Set the gray values. Increase to brighten and decrease to darken. | |
| EXRDisplay | Exp | Set the exposure of the image. You can lighten or darken the image to reveal detail in the high or low end. |
| Defog | Compensate for fogging due to stray light in the recording device. | |
| Knee Low and Knee Hi | Set the white level of the image, which determines which value is mapped to the maximum intensity of the display. | |
| Gamma | Set the gray values. Increase to brighten and decrease to darken. |