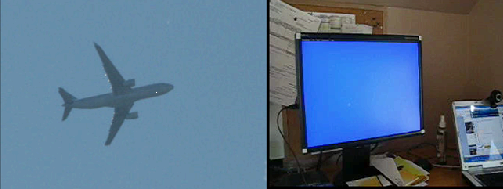
In order to correctly project images onto televisions, bulletin boards, and other quadrilaterals in an image sequence use the 4-Point tracking workflow.
With four-point tracking (also known as corner pinning), you use four trackers to generate tracking data for anchoring the four corners of a bilinear surface to background footage.
The reference points you use must be well-defined; it is recommended that you plan them when shooting the sequence (for example, add markers to the scene). It is not always possible to do four-point tracking when the reference points are not well-defined.
In the following example, the goal is to pin an image of a jet to the screen of a monitor as the camera moves.
You can also use the Reaction tool, and the position and translation parameter controls of the Warp2D tool, and the position and translation vertices parameter controls of the Garbage Mask, and Remove Dust tools.

To corner pin and track a bilinear surface to background footage:

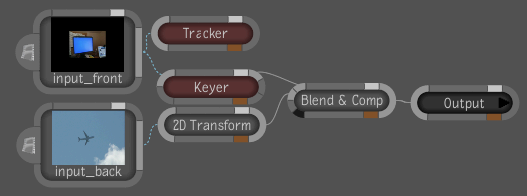
| Node | Purpose |
|---|---|
| Input image (front) | This is the footage that will tracked. |
| Input image (back) | This image will be corner-pinned onto the front footage. |
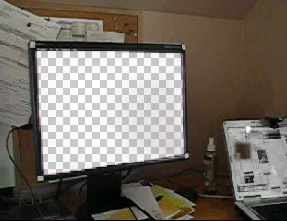
| Keyer | The Keyer is used to remove the blue portion of the monitor. |
| Tracker super tool | The Tracker will track and analyze the movement of the four corners of the monitor. The Tracker super tool is used because multiple Tracker Analyzers are required. |
| Blend & Comp | The Blend & Comp node will combine the two processed images. |
| 2D Transform | The 2D transform tool will apply the necessary transformations to the image to be corner-pinned. |
| Output | Outputs the final composition. |


