Projects are the basic elements of file management within MatchMover and it is important that you understand what a project contains. A project is defined as one scene.
MatchMover projects files have the ".mmf" extension. You can load as many image sequences within a project, as long as they are from the same scene and contain points that are common.
To start a new, empty project, do one of the following:
 in the Toolbar.
You can load a project previously saved to disk under the (.mmf) format.
To open an existing project, do one of the following:
 in the Toolbar.
If a project is already open, MatchMover prompts you to save it before opening a new one.
 or Save As to change the project file.
MatchMover saves the project with the ".mmf" extension.
Setting the project preferences
You can set various project and display preferences in the User Preferences window by selecting Edit > Preferences. For example, in the Colors page, you can define the default colors for various project elements.
You can also set up the Image Cache Size, which refers to the amount of memory (%) used for storing the real time RAM playback. The higher, the smoother the playback and scrubbing you will have. If you are running other applications in the background, or plan to leave MatchMover running on the background then it is suggested to lower the amount.
All 2D images are always stored in the cache. By default, 3D textured images are not stored in the cache, but this can be enabled in the cache preferences. You can opt to display 3D textures, even in 2D Mode.
The current Cache Manager status is displayed in Status Bar as a semi-circle (current memory used in color/memory available in gray).

The cache can also be flushed by selecting Edit > Flush Cache or pressing Ctrl+Del.
Resetting the project preferences
The Reset Page and Reset All buttons at the bottom of the Preferences window can be used to change the current values to their default status, either for current page or for all pages. This action can be cancelled by pressing the Cancel button in the Preferences window, but once the window is closed, it cannot be undone.
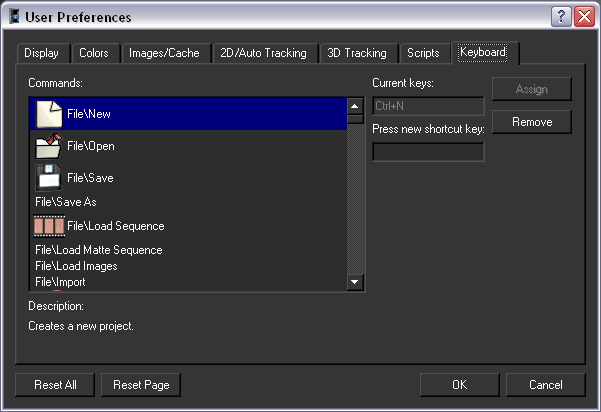
Setting user-defined shortcuts
Every command can have a user-defined shortcut that can be set in the Keyboard tab of the Preferences window.