The MaxScript generated by MatchMover allows you to import the camera trajectory and the 3D points calculated by MatchMover.
- Choose Utilities > MAXScript > Run Script.
- In the File window, load the MAXScript that you have just created with MatchMover.
After the loading the scene contains:
- A root object called rzGroup which you can use to move the entire scene exported from MatchMover.
- A camera object with animated transformation and focal length.
- All 3D objects in the project.
- An image plane, eventually undistorted, attached to the camera with a size and coverage initialized to assure the right matching
between the camera aperture and the tracked sequence.
- The 3D points as "null object".
- Correct render settings.
- Synchronized cameras with their respective image planes in case of a MOCAP project.
Rendering
Select Rendering > Render from the menu or Render Scene from the toolbar.
Interlaced sequence
If the original sequence is interlaced and you want to keep the same fluidity of movement, you have to render in interlaced
mode. To do this, check the Render to Fields box.
When you do this you must keep the exact original image size so that each synthesized frame superimposes exactly on the original
sequence.
To keep the frame order the same as that used in MatchMover, it may be necessary to modify
the frame order in 3ds max.
- Select File > Preferences from the main menu and open the Rendering page.
- Select the correct order in the Field Order radio buttons.
Compositing in 3ds max
It is possible to do the compositing directly in 3ds max in order to merge live action with a computer-generated model.
If you wish, you can delete the image plane and use the sequence as a background image.
The following procedure represents the simplest way to define a background image concerning the pixel aspect matching. When
this is done correctly, the background image should exactly match the 3D.
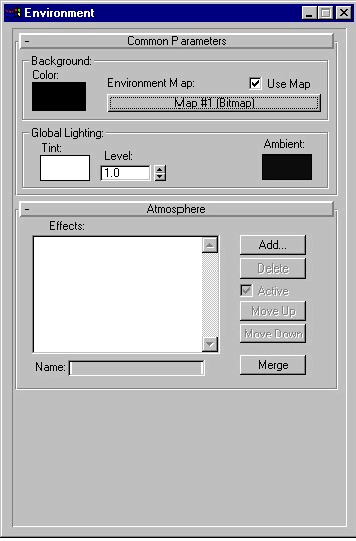
- Select Rendering > Environment.
- Define an Environment Map of the type Bitmap.
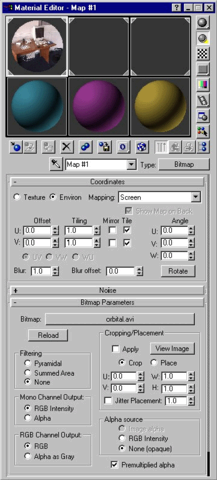
- While keeping the Environment window open, open the Material Editor from the toolbar.
- Drag and drop the Map #1 (Bitmap) to a channel of the material editor using the Instance method.
- In the Material Editor, choose the image to use as the background.
- Set Bitmap > Parameters > Filtering to none.
- Set Coordinates > Mapping to Screen.
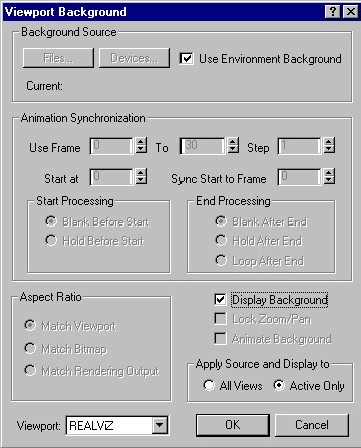
- Select Views > Background Image and check the Use Environment Background box.
If the matching between the background image and the 3D is not "clean", there are two possible reasons.
- The start of the sequence does not correspond to the start of the camera trajectory. In Material Editor > Time, change the Start Frame field for the environment map.
- The background image is interlaced but when 3ds max does a filtering, you have the impression of a mismatch in the camera
view. However the render is okay. You can solve this display problem by creating a non-interlaced sequence and by using it
as the background image while keeping the interlaced environment map.
Other problems
Sometimes, when your sequence contains very far points, the 3ds max camera can have problems calculating the clipping planes
(the objects situated in front of the camera are not visible in the camera view). If this is the case, you must use the manual
clipping mode and define the near and far parameters of the clipping.