You can read and edit script files other people have created in the Script Editor. In this section, you open a script that contains a completed user interface for the makeRoll procedure. However, the user interface is only a layout, and does not contain any functionality.

When Show Line Numbers is on, line numbers appear beside the commands in the Script Editor. The lesson occasionally refers to line numbers to tell you where to make a modification to the script. When line numbers are referred to in the lesson, they are always the line numbers of the original script.
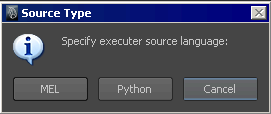
A pop-up window asks you in which language should the commands entered in this tab execute in.

In the next steps, you load a user interface script into both MEL tabs. The MEL tab will contain the original script, and the MEL2 tab will contain the user interface script with your modifications. This way, line numbers can be referenced from the original script to inform you where to make a modification.
To open a script file in the Script Editor
This file can be found in the GettingStarted directory that you set as your Maya project, within the mel sub-directory.
The contents of the MEL file are displayed in the Script Editor.

A user interface is created for the makeRoll procedure. There is a control in the user interface for each argument of the makeRoll procedure.
(You can leave this window open as we’ll be doing some testing with it, though it doesn’t do anything yet.)
Discussion: what the script does
the script has been broken up into sections to describe the various user interface controls and their flags. The user interface controls and commands that you used earlier in the lesson are described only briefly below.
if(`window -exists makeRoll_Window`)
{ deleteUI makeRoll_Window;
}
The conditional statement checks if a window with the specified name exists. If the window exists, it deletes it.
window -resizeToFitChildren 1 makeRoll_Window;
The window command creates a user interface window to contain the controls. For more information, see Creating a window.
columnLayout;
The columnLayout command creates a layout that arranges the controls within it in a column. For more information, see Referencing controls.
string $obj_name_text =
`textField
-editable 0
-width 400
-text "name_Of_Object"`;
The command textField creates an editable text field. The text field command has multiple flags. The name and path of the text field are stored as a variable. See Storing control names.
string $ground_int= `intSliderGrp
-minValue -20
-maxValue 20
-fieldMinValue -20
-fieldMaxValue 20
-field 1
-label "Ground Plane"`;
string $diameter_float= `floatSliderGrp
-value 1.0
-minValue 1.0
-fieldMinValue 1.0
-field 1
-label "Diameter"`;
The commands intSliderGrp and floatSliderGrp create sliders. Commands ending in Grp create a group of linked controls. The slider commands create controls for a label, a value box and a slider. The slider command has multiple flags. The name and path of the slider are stored as a variable. See Storing control names.
separator -height 20 -width 120;
The command separator creates a horizontal line. It is used to space the controls vertically in the window. The separator command has multiple flags.
string $box_sim_checkbox = `checkBox -value 1 -label "Box Simulation"`;
string $sphere_sim_checkbox = `checkBox -value 0 -label "Sphere Simulation"`;
separator -height 20 -width 120;
button
-label "Execute!"
-command "print (\"something\");";
The command checkBox creates a check box. The check box command has multiple flags. The name and path of the check box are stored as a variable. See Storing control names.
showWindow;
This command enables the last created window’s visibility. For more information, see Creating a window.