


Learning Resources > Tutorials > Getting Started with Maya > Painting > Lesson 2: Painting in 3D
using Paint Effects >
Using turbulence with brush
stroke tubes
In the ocean, kelp would react to the turbulence created by ocean currents. The tube attributes associated with many preset brushes have turbulence attributes turned on for interesting visual effects. Turbulence attributes can be increased from their default settings to make the kelp sway back and forth, providing additional realism when used in an animation.
To increase the turbulence on the kelp brush tube
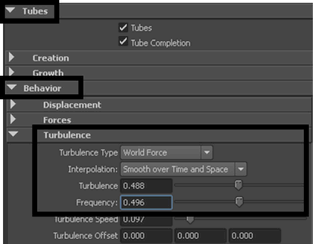
You can adjust the turbulence settings while viewing the playback. If the frame range is too short, you can modify it to suit your needs.