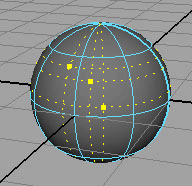
The Maya Muscle plug-in provides a way to easily generate locators stuck onto the surface of NURBS or polygon mesh objects, even if they deform. This lets you generate a regular object that is effectively always on the surface point of the mesh as it moves. You can use these objects to parent muscle controls to, or when specifying the Attach object in the Muscle Creator or Muscle Builder windows.
To generate an attach point for a NURBS muscle or object
 -click
a NURBS object or muscle and select Surface Point from
the marking menu that appears. (For polygons, select Polygon
Faces instead of Surface Points.)

A Muscle Surf Attach node is created, and you have color-coded locators for each surface point. These locators stay attached to the surface of the NURBS object even if it deforms.
