Learning Resources > Tutorials > Getting Started with Maya > nParticles > Lesson 2: Creating a smoke
simulation with nParticles >
Creating an nParticle system
In this part of this lesson, you create an nParticle object and its emitter object. An emitter controls the position, direction, quantity and initial velocity of the emitted nParticles when they are born (emitted into the scene).
Creating an nParticle and emitter object
To create an nParticle and emitter objects
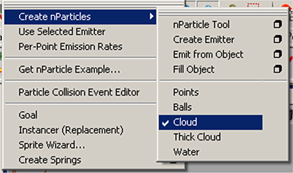
Selecting Cloud presets some nParticleShape attributes that are suitable for simulations such as smoke, dust, or fog.
 .
.
The Emitter Options (Create) window appears.

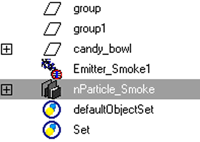
Naming your emitter object makes it easier to identify in the Outliner when you want to select it and make attribute adjustments.
Selecting a solver determines which Maya Nucleus system your nParticles belong to.
An Emitter_Smoke1, nParticleShape1, and a nucleus1 node appear in the Attribute Editor.
 .
.
Renaming your nParticle object makes it easier to identify when you have more than one in your scene.
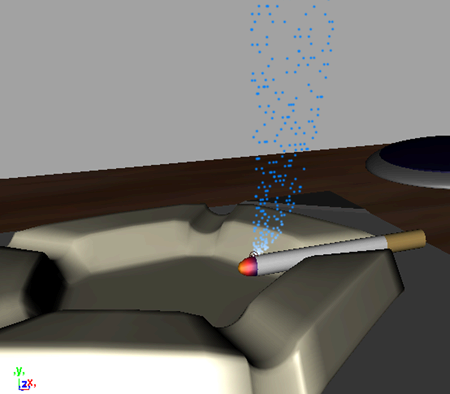
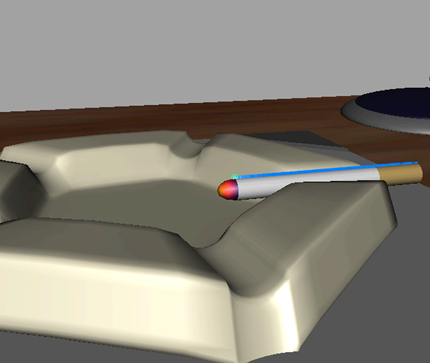
When you create an nParticle and emitter objects, they are placed at the scene origin. For this lesson, you need to move the emitter so that the particles are emitted near the tip of the cigarette.
To move the nParticle emitter object
The nParticle emitter is now positioned near the tip of the cigarette.
nParticles are emitted from the end of the cigarette, however, they moving along the X axis and away from the cigarette. This is because the force of the Nucleus Gravity is not yet affecting the nParticles. By default, the Cloud type nParticles are created with Ignore Solver Gravity on, so you need to turn this option off.
 .
.
nParticles are emitted from the end of the cigarette, however, they are falling down and out of the scene. This is because the force of Nucleus Gravity is negative, so it pulls the nParticles down. You must change the direction of gravity to force the nParticles up.