Preview layers


By default, the Render View will show you a composited view of all layers in your scene with your specified blend modes. You can override this default by changing the value of Render > Render All Layers in the Render View, or Options > Render All Layers in the Render Layer editor.

You can choose to only show specified layers or to only show the selected layer in the Render View.

As well, you can choose to keep all images that make up the composited Render view, or simply render a single composited image.

To preview render layers in the Render View

  1. To view all your layers composited with the specified blend mode settings, turn on Render All Layers in the Options menu of the Render Layer editor or the Render menu of the Render View.
  2. By default, a composited result of all layers is shown in the Render View.
  3. To view all your layers rendered as individual images, change the Render All Layers option (Options > Render All Layers > ) from Composite Layers to Composite and Keep Layers, or just Keep Layers.

    NoteUsing Keep Layers significantly increases memory usage in Maya. Consecutive use populates the Render View with more and more images. You must clear out images manually as needed.
  4. To preview the composite of only some layers, turn on Render All Layers, and turn off the Rendering flag on the layers you want to exclude (click on the R icon next to the layer name).
  5. To preview a particular layer, select it and make sure the Render All Layers option is turned off.

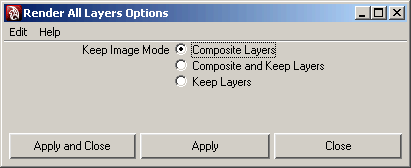
As well, the command-line render supports layers. When you use the -r file flag during a command-line render, each layer will be rendered with the renderer specified in the file. For more information, see Batch and command-line render with layers.

Layer blend modes

To set blending modes for layers

  1. Select a layer.
  2. Choose a layer blend from the drop-down menu at the top of the Render layer editor.

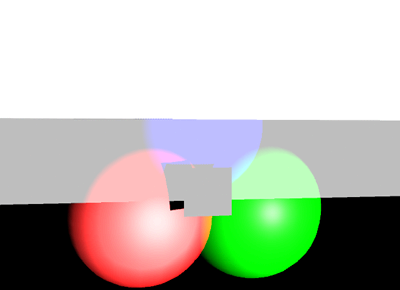
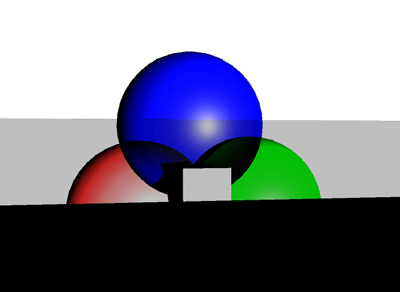
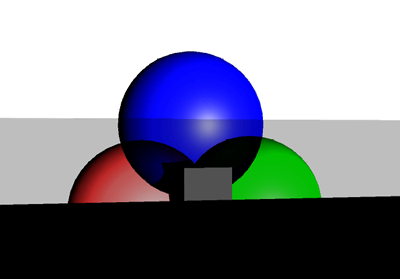
As you activate individual layers, you'll see the layer blend mode change.

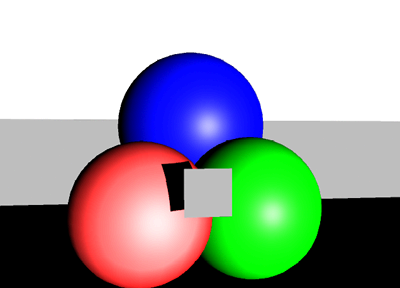
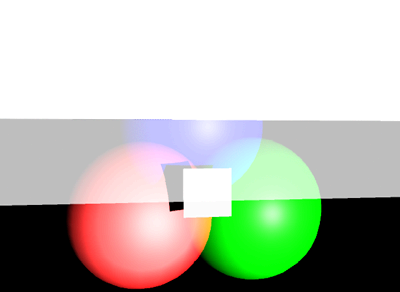
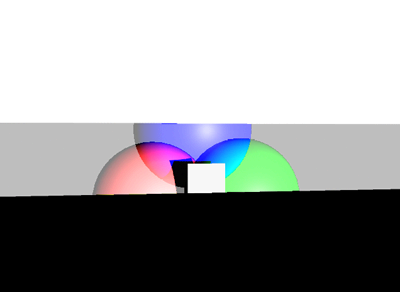
The following examples show a very simple scene: three spheres colored red, green, and blue, with a small plane in front casting a shadow.

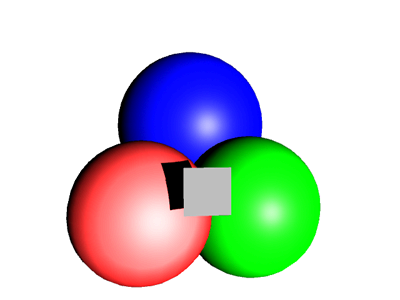
The spheres are in the foreground and are rendered with various blend modes against a white, gray and black background.

Maya supports the following render layer blend modes:

Blend mode Description Example

Normal

The foreground texture is applied like a decal to the background. The shape of the decal is determined by the foreground alpha.

Lighten

Uses whichever pixel in the rendered layer is lighter as the resulting color.

Darken

Uses whichever pixel in the rendered layer is darker as the resulting color.

Multiply

Multiplies the composited render's color by the rendered layer color. The resulting color is always a darker color. Multiplying any color with black (value of 0) produces black. Multiplying any color with white (value of 1) leaves the color unchanged.

Screen

Multiplies the inverse of the rendered layer and the composited layers colors. The resulting color is always a lighter color. Screening with black leaves the color unchanged. Screening with white produces white.

Overlay

Multiplies the colors, depending on the composited color. Patterns or colors overlay the existing pixels while preserving the highlights and shadows of the base color. The base color is mixed with the rendered layer color to represent the lightness or darkness of the original color.

NoteIf you use any other render layer blend modes, the preview results may not be what you expect; however, the results may be helpful for determining layer priority and other layering factors.