


Learning Resources > Tutorials > Getting Started with Maya > Scripting in Maya > Lesson 4: User interface
creation and procedures >
Linking the user interface
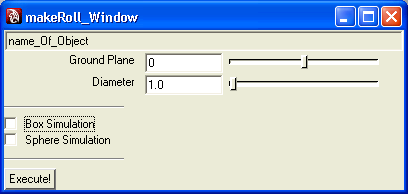
Currently the user interface in the window doesn’t do anything: moving the sliders and clicking the check boxes has no effect. In this section you learn how to link the user interface to the makeRoll procedure you used earlier:
In the following steps you modify the user interface script.
A completed version of the user interface script named Mel_UI_Final.mel is available in the GettingStarted project directory, within the mel sub-directory.
Displaying the currently selected object
The makeRoll procedure does not act upon the currently selected object. You will modify the script so that the textField control will display the name of the currently selected object.
To return the name of the currently selected object, use the ls command (list) with the selection. Since you can select multiple objects in Maya, the return from the ls command is not a string, it is a string array, even if only one object is selected. An array is an ordered list of values used to store multiple items of the same data type within one variable. The makeRoll procedure cannot accept a string array as an argument, so you must modify the data returned by ls -selection.
In this next section, we’ll also create a new tempMEL tab so you’ll have a place to test commands as you learn them.
To store the names of the currently selected objects as a variable
select -allDagObjects;
$all_selected_objects =`ls -selection`;
This command lists currently-selected objects and outputs their names to a variable.
print $all_selected_objects;
This command outputs the list of stored objects to the Script Editor.
The following is output to the Script Editor:
roll_Cube pPlane1
The variable $all_selected_objects is an array of strings. That is, it stores multiple strings within the variable. Values in an array are called elements.
Reduce your selection by extracting a single value from an array using an array index.
To reduce the selection to one object
$first_selected_object=$all_selected_objects[0];
select $first_selected_object;
The first element of the array, the roll_Cube, is selected.
Elements of an array are accessed using square brackets containing the index number of the element you want to extract from the array. The index number of arrays start counting from zero.
$all_selected_objects=`ls -selection`;
$first_selected_object=$all_selected_objects[0];
select $first_selected_object;
These commands change your selection to the object you selected first.
$first_selected_object
$obj_name_text = `textField -editable 0 -width 400 -text $first_selected_object`;
The text field now displays the currently selected object.
If you attempt to execute the modified user interface creation script without an object selected, an error occurs, as no elements exist in the string array $all_selected_objects.
Check boxes can also use command flags, similar to a button. A check box has more functionality than a button, so the command flags are different. Check boxes have three possible command flags; changeCommand, onCommand, and offCommand:
You can use the checkBox command with an edit flag to change the state of a check box in the user interface.
To change the values of elements in the user interface
checkBox -edit -value 0 $box_sim_checkbox;
The Box Simulation check box, which was turned on, is now turned off. You can repeat this command with a value of 1 to turn the check box back on.
This shows the use of the edit flag with a command as an argument to a command flag, which allows you to change values.
We’ll now use the onCommand and offCommand flags to keep the two check boxes in sync, so that when one check box has its state changed, the other check box is set to the opposite state.
$box_sim_checkbox = `checkBox -value 1 -label "Box Simulation" -onCommand "checkBox -edit -value 0 $sphere_sim_checkbox;" -offCommand "checkBox -edit -value 1 $sphere_sim_checkbox;"`; $sphere_sim_checkbox = `checkBox -value 0 -label "Sphere Simulation" -onCommand "checkBox -edit -value 0 $box_sim_checkbox;" -offCommand "checkBox -edit -value 1 $box_sim_checkbox;"`;
The commands you are replacing are located on lines 35-43 of the original script file.
The makeRoll procedure requires arguments to execute. To link it to the window, you must get the values for the arguments from the controls in the user interface, and execute the makeRoll procedure with these arguments.
To get the values of the controls, you must use the query flag. The query flag allows commands to return values of attributes in the scene.
To query a value in the user interface
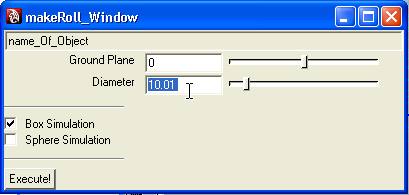
print ("The diameter is: " + `floatSliderGrp -query -value $diameter_float`);The following is output to the Script Editor
The diameter is: 10.01
The query flag allows you to output a value to the Script Editor.
Change the command flag of the button so that it calls makeRoll command with arguments values that are the same as the specified values in the user interface.
To link the button to the makeRoll procedure
-command "makeRoll \ `textField -query -text $obj_name_text` \ `intSliderGrp -query -value $ground_int` \ `checkBox -query -value $box_sim_checkbox` \ `floatSliderGrp -query -value $diameter_float`;"`;
Every argument of the user interface is defined by querying the user interface elements. The backslash at the end of a line allows the command flag argument to span multiple lines.
Your user interface is now fully functional!
A completed version of the user interface script named Mel_UI_Final.mel is available in the GettingStarted project directory (GettingStarted/mel).