


Importing additional tracking
data
To help you improve the solution, we have created another set of track points for you to import.
To import the additional tracking data
While the solver runs, examine the following illustration to learn about the points you just loaded and why they were chosen to improve the solution.
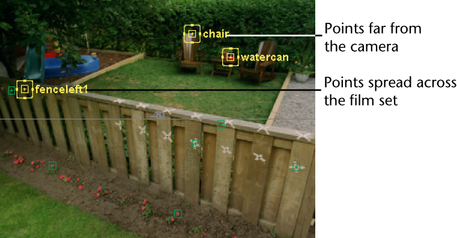
In general, having a diversity of points, such as points far and near the camera, is critical to helping the solver.
If you have a larger Overall Pixel Slip, the problem may be that initial1 was selected when you solved again. Try selecting solution_rf instead and clicking Solve again. The solution you have selected when you click Solve can affect the outcome of the solver.
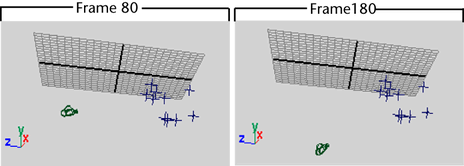
In this case, viewing from below the grid is best because the locators and camera are below the grid in this solution. You must ignore where Live has placed the camera and locators relative to the perspective grid.
Only look at the arrangement of the locators and the movement of the camera. They should resemble the arrangement of points and the camera motion as seen in the shot. For example, notice the points along the fence are aligned along a plane, just as they are in the shot.
If you compare frames 80 and 180, you’ll see that the camera now moves downward relative to the locators. This movement is what you would expect the camera to do for this shot.
At this point, you can assume that your matchmove is complete and accurate. However, to be absolutely sure, you need to play the animation with a model placed in front of the camera. If the model does not appear to slip relative to the background, then your matchmove is accurate. To learn about this type of testing, continue with the next lesson.