Learning Resources > Tutorials > Getting Started with Maya > Maya Basics > Lesson 1: The Maya user
interface >
The Maya interface
Now that Maya is running, you first need to understand what you are seeing. There are a lot of items displayed in the Maya user interface.
The best way to begin is to learn the fundamental tools and then learn additional tools as you need them. Begin by learning some of the main tools.
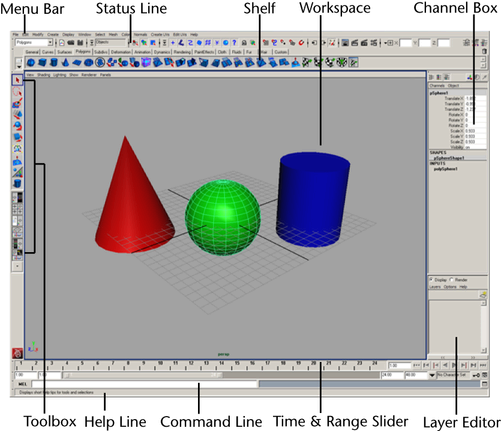
The Maya workspace is where you conduct most of your work within Maya. The workspace is the central window where your objects and most editor panels appear.
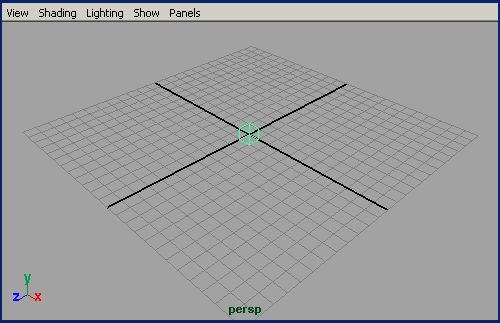
When you start Maya for the first time, the workspace displays by default in a perspective window, or panel. There are the other components of the default perspective view panel:
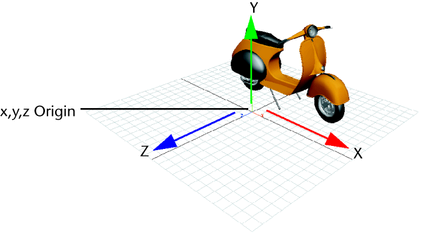
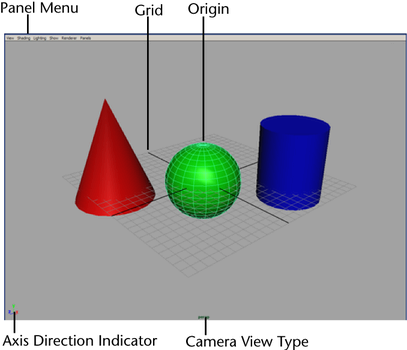
In Maya, like many other 3D applications, the three dimensions are labeled as the X, Y, and Z axes. The origin is located at X, Y, Z position of 0, 0, 0. The grid also lies along the X, Z plane. We refer to this as a plane because you might visualize an imaginary, flat, two-dimensional square laying along this 3D position.
Maya labels the X, Y, and Z axes with a color scheme: red for X, green for Y, and blue for Z. Many tools that you use in Maya use this color scheme to indicate that you are accessing a particular item that relates to X, Y, and Z in some way.
The axis indicator shows in which direction, X, Y, or Z, you are viewing the Maya scene. The axis indicator is color coded in the red, green, and blue color scheme and appears in the lower left corner of a view panel.
This is extremely useful if you are new to 3D, as many of the instructions in this manual and the Maya Help assume you know where you are viewing the scene in relation to the X, Y, Z axes.
Tools and items are accessible from pull down menus located at the top of the user interface. In Maya, menus are grouped into menu sets. These menu sets are accessible from the Main Menu bar.
The Main Menu bar appears at the top of the Maya interface directly below the Maya title bar and displays the chosen menu set. Each menu set corresponds to a module within Maya: Animation, Polygons, Surfaces, Rendering, and Dynamics. Modules are a method for grouping related features and tools.
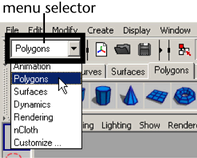
You switch between menu sets by choosing the appropriate module from the menu selector on the Status Line (located directly below the File and Edit menus). As you switch between menu sets, the right-hand portion of the menus change, but the left-hand portion remains the same; the left-hand menus are common menus to all menu sets. The left-hand menus contain File, Edit, Modify, Create, Display, and Window.
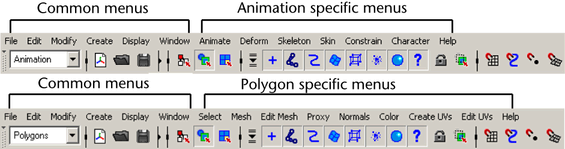
The Main Menu changes to display the menu set that relates to the Animation module. In particular, menu titles such as Animate, Deform, Skeleton, Skin, and so on, appear.
The main menu changes to display the menu set for Polygons. Menu titles such as Select, Mesh, Edit Mesh, and so on, appear.
For now, leave the menu set at Polygons. You will use this set in the next step.
To create a primitive 3D object from the Polygons menu set
Maya creates a 3D cube primitive object and places it at the center (origin) of the Maya workspace.
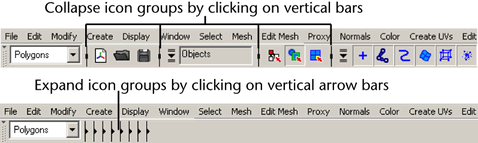
The Status Line, located directly below the Main Menu bar, contains a variety of items, most of which are used while modeling or working with objects within Maya. Many of the Status Line items are represented by a graphical icon. The icons save space in the Maya interface and allow for quick access to tools used most often.
In this lesson, you learn about some of the Status Line areas.

You’ve already learned the first item on the Status line: the Menu Selector used to select between menu sets.
The second group of circled icons relate to the scene and are used to create, open, and save your Maya scenes.
The third and fourth group of buttons are used to control how you can select objects and components of objects. You will learn more about selection of objects in later lessons.
The fifth group of icons are used to control the Snap Mode for objects and components. You will begin to use these tools in a later lesson in this chapter.
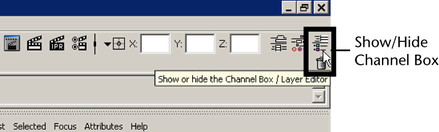
The last section comprise three buttons that are used to show or hide editors, including the Attribute Editor, Channel Box, Layer Editor, and Tool Settings. The default display shows the Channel Box and the Layer Editor. When you create an object, like the cube for example, information about that object displays in these editors. You will learn how to use these editors later in this chapter.

For better organization on the Status Line, all of the icon buttons are broken into groups that you can expand and collapse, as shown.
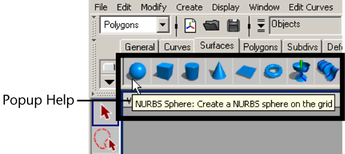
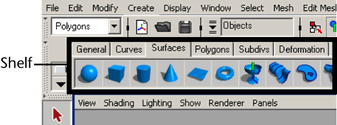
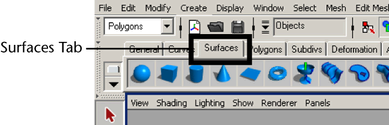
The Shelf is located directly below the Status line. The Maya Shelf is useful for storing tools and items that you use frequently or have customized for your own use. You can keep the tools and items you use most frequently in a location that provides handy access. Maya has some of the Shelf items pre-configured for your use.
To create an object using a tool from the Shelf
Maya creates a sphere primitive object and places it at the center of the Maya workspace in the same position as the cube.
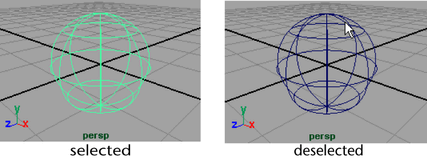
In your scene view the wireframe outline of the cube you created earlier in the lesson has changed color to navy blue, and the sphere is displayed in a bright green color. The sphere is now the selected object and the cube is no longer selected. In Maya, when the object displays like this, we refer to it as being selected or active.
Selection of objects and components is a way of indicating to Maya that this particular item is to be affected by the tool or action you will subsequently choose. As you work with Maya, you will be selecting and deselecting items a lot. You will learn how to select and deselect objects later in this chapter.
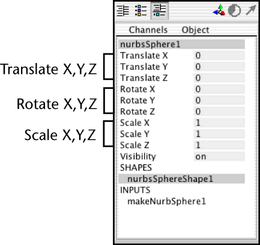
Some numerical information appears in the Channel Box editor on the right hand side of the user interface. This information relates to X, Y, and Z, translation, rotation, and scaling for the active object. The X, Y, and Z Translate numerical values are currently set to 0. This indicates that the sphere’s location is at the origin. The Channel Box is useful for viewing and editing this type of basic information. You will use the Channel Box later in this chapter.
To hide or show the Channel Box
The Channel Box disappears, and the perspective scene view expands slightly. With the Channel Box hidden, you have more working area in your scene view.