


User Guide > Rigging > Character Setup > Skinning > Smooth skinning > Understanding smooth skinning >
Smooth skin point weights
During smooth skinning, for each smooth skin point (for example, each CV of each NURBS surface), Maya assigns a smooth skin point weight for each joint that controls the influence of that joint on each point.
If you want to change the results of smooth skinning to create unique skeletal deformation effects, you can edit or paint the weights of smooth skinning at the point level (the CV, vertex, or lattice point level). Additionally, to add further deformation effects to smooth skin, you can use Maya’s deformers and smooth skin influence objects.
Joints closer to a smooth skin point will have a greater influence than joints far from the skin point. The joint closest to a smooth skin point will have the greatest influence.
Which joints have the next greatest influence can depend on whether you want Maya to consider the skeleton’s hierarchy during binding or to ignore the skeleton’s hierarchy during binding.
Weighting based on skeleton hierarchy
If you tell Maya to consider the skeleton’s hierarchy, the joint that will have the next greatest influence will be a relative (parent or child) of the closest joint. For example, if your character’s arms are hanging down so that the forearm bones are near the hip bones, you can make sure that the skin points for the arms do not come under the influence of the hip bones. This is because the hip bones are not near the forearm bones in the skeleton’s hierarchy even though the distance between them is small.
When you bind skin, you tell Maya to consider the skeleton’s hierarchy by setting the Bind Method option to Closest Joint. See Skin > Bind Skin > Smooth Bind.
Weighting based only on joint proximity
If you tell Maya to ignore the skeleton’s hierarchy (set Bind Method to Closest Distance), the next joint that will have the next greatest influence on a smooth skin point’s weight is always the next closest joint to the point. Depending on the structure of the skeleton and the placement of the model, this joint could be much higher or lower in the skeleton’s hierarchy than the closest joint. For example, if your character’s arms are hanging down so that the forearm bones are near the hip bones, the hip bones could have the second greatest influence over the skin points for the arms. This could lead an inappropriate influence on the weights of the arm’s skin points.
When you bind skin, you tell Maya to ignore the skeleton’s hierarchy by setting the Bind Method option to Closest Distance. See Skin > Bind Skin > Smooth Bind.
Weighting can be influenced by varying number of joints
You can control how many of the skeleton’s joints can influence a smooth skin point’s weight. A typical value for a character would be a maximum of four or five joints that can influence a given smooth skin point.
When you bind skin, you tell Maya how many joints can influence a smooth skin point by specifying the Max Influences option. See Skin > Bind Skin > Smooth Bind.
Weighting varies based on joint distance
The influence of each joint on a smooth skin point’s weight varies with the distance between the skin point and the joint.
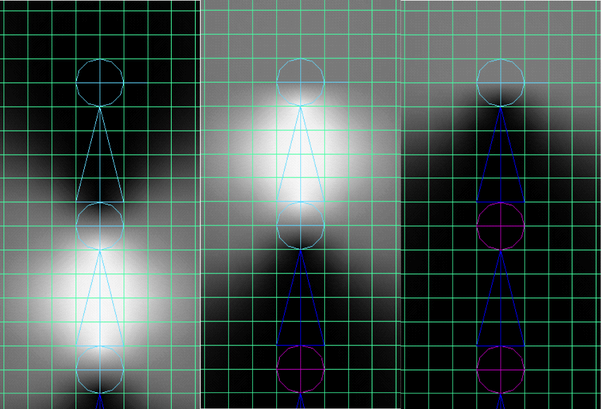
Note that if the joint has a bone, the influence of the joint extends along the entire bone, from the center of the joint to the end of the bone. The joint’s influence can extend to all the points near the entire length of the bone. If the joint is an end joint (has no bone), then the joint’s influence just extends forward from the center of the joint.
When you bind skin, you tell Maya how the weighting varies based on joint distance by specifying the Dropoff Rate option. See Skin > Bind Skin > Smooth Bind.