


Learning Resources > Tutorials > Getting Started with Maya > Rendering > Lesson 2: Shading surfaces >
Beyond the lesson
In this lesson, you were introduced to some of the features available for shading surfaces. You learned that:
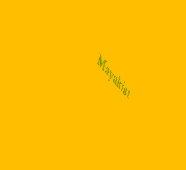
When you put the Mayakist logo on the surface, the letters appeared straight. The letters are actually skewed in the texture. We skewed the logo for your use in this lesson so that it looks straight when stretched onto the surface.
In your own work, skewing texture images is usually too difficult and impractical. A more practical Maya technique for assigning and positioning file textures is to use texture projection. With this feature, you project the texture onto the surface as if you are projecting a slide image onto a screen. The texture is positioned where the projection strikes the surface. Instead of a skewed Mayakist logo, you could use a straight logo and project it onto the sphere. You could tune the angle of projection so that the curvature of the surface skews the logo just as in the lesson. To assign textures as projections, you turn on the As Projection option at the top of the 2D Textures section of the Create Render Node window.
The placement of texture projections is similar to the placement you performed for the bump map (3D) texture. Like the bump map texture, you need to parent the texture projection (the place3dTexture node) to the object in order to avoid the texture placement changing when the object moves.
Suppose you want to add a scarred pattern to the orange skin. Because you can only have one texture assigned to the Color attribute you can use a Layered Texture to combine two or more texture maps.
The Layered Texture is a texture node that lets you composite or layer several textures on top of each other. You assign it to a material’s attribute just like other textures. Within the Layered Texture’s attribute controls, you can connect other textures and control how they blend together. For example, the bottom layer could be the logo image you used in the lesson, and a top layer could be an image of streaking lines that resemble scars. The combined logo and scars would give the orange the final aged look that you wanted.
As an option, you can install a Shader Library with Maya to help you quickly create common materials, such as bricks, fabrics, foods, and many other surface types. When installed, a Shader Library tab appears in Hypershade. To use a material, find the type of shading you want, drag and drop it into Hypershade, then drag and drop it onto a surface in your scene using the middle mouse button.