


Learning Resources > Tutorials > Getting Started with Maya > Rendering > Lesson 2: Shading surfaces >
Assigning a shading material
In the next steps, you create a material and assign it to the surface. A material is a collection of attributes that define color, shininess, and other surface characteristics.
To assign a material to an object
The default material attributes appear in the Attribute Editor.
The default material assigned to the sphere (and all other surfaces) is a type of material called Lambert. The material displays the surface with gray shading. You should not edit the default shading material.
The new material’s attributes appear in the Attribute Editor.
A Blinn material gives a surface a shinier look than a Lambert material. Blinn is a good choice for creating a variety of surface appearances. Knowing which material type to use for a particular surface comes with practice. Fortunately, you can change the material type later on, so you do not need to make a decision now. You will learn more about material types later in the lesson.

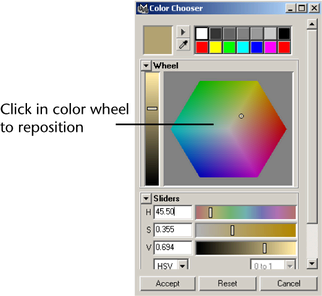
The sphere becomes the same color you select in the Color Chooser. Also drag up the slider to the left of the hexagon to get a brighter shade.
If you compare the color in the Color attribute box with the sphere’s color in the scene view, you’ll notice a difference.
The color you assigned is only one aspect of surface appearance. The appearance also depends on how the surface reacts with light. The main attributes that control the reaction to light are under the Common Material Attributes heading. As an example of these attributes, you will change the Diffuse setting.
This will help create the illusion of a bright orange.

In practical usage, the Diffuse setting makes a surface appear brighter. The name diffuse comes from a property in physics that describes how light spreads after it strikes a surface. A surface with a high diffuse property spreads the light that strikes it, making the object appear brighter.
Like the Diffuse attribute, the other Common Material Attributes also refer to general characteristics of light and the way a surface reacts to light.
The next section in the Attribute Editor, Specular Shading, contains attributes that control the appearance of shiny highlights on the surface.
Next, you’ll alter the surface specularity—the amount of light that reflects off a surface, resulting in shiny highlights.