


Learning Resources > Tutorials > Getting Started with Maya > Scripting in Maya > Lesson 2: Saving scripts
to the Shelf >
Setting up the scene
Here, you create some primitive objects to display lighting and shading .
polyPlane -height 40 -width 40;
A plane appears at the origin.
The height and width flags specify the dimensions of the plane.
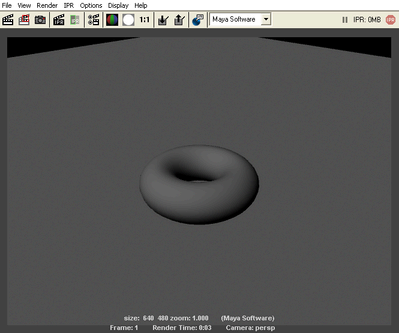
torus -axis 0 1 0 -heightRatio 0.5;
A torus appears at the origin.
The axis of the torus specifies the orientation of the major axis of the torus. The height ratio flag specifies the ratio of the major radius of the torus to the height of the torus.
move 0 0.5 0;
The move command takes the argument (x, y, z), specifying how much and in what direction to move the selected or named object. This above command moves the torus 0.5 units up on the Y-axis.
The Render View opens with a rendered image of the scene.
A scroll bar at the bottom of the Render View lets you scroll through your saved rendered images.
In the next steps, you type commands to create three-point lighting in the scene and record them as script history for later use.