Learning Resources > Tutorials > Getting Started with Maya > Rendering > Lesson 1: Rendering a scene >
Refining shading materials
for objects
You can refine the shading materials in the scene to make the objects appear more realistic. In the next steps you connect (or apply) a procedural texture to the counter, and a ramp texture to the apple. These textures are connected to the color attribute of the shading material for each surface to provide natural surface variation. When you connect textures, you create shading networks. You’ll learn more about shading networks in a later lesson.
A procedural texture is a 2D or 3D texture calculated based on an algorithm or mathematical formula. It can be useful for creating random patterning. A ramp texture is a 2D texture or color gradient in which the color or grayscale value changes across the image.
To connect a procedural texture to the counter surface
The Attribute Editor for the counter_lambert material appears.

The Create Render Node window appears and lists the various textures you can connect to the color attribute of the Lambert material assigned to the counter surface.
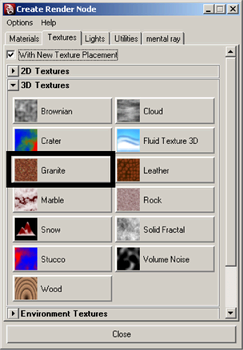
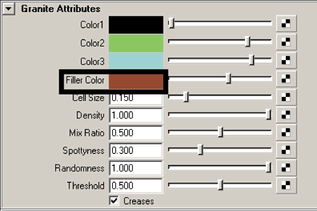
The procedural texture gives the counter the look of a stone granite counter top when it is rendered, and provides the context for the scene.
To connect a ramp texture to the apple surface
The Attribute Editor updates to display the appleSkin_blinn material properties.
The Create Render Node window appears and lists the various texture patterns you can connect to the Color attribute of the Blinn material assigned to the apple.
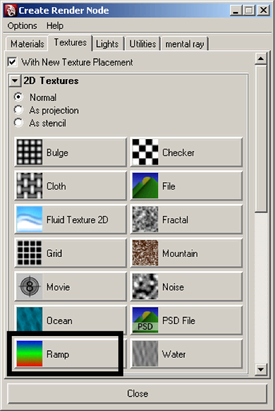
This texture creates a gradation through a series of selected colors. Applying the ramp texture provides the apple with a realistic variation in surface color.
The Ramp Type indicates the direction of the color gradient. A U ramp applies the gradient in a linear, vertical direction across the object.
A new set of color handles appears in the ramp, for a total of four color components.

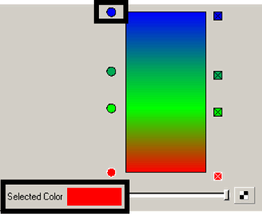
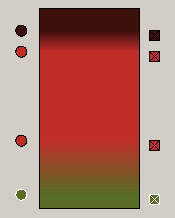
The position of these handles and the corresponding colors affect the location and breadth of the color within the gradient on the apple’s surface.
In the next section you render your scene to view the textures and materials you’ve assigned to the objects.