


Learning Resources > Tutorials > Getting Started with Maya > Dynamics > Lesson 1: Particles, emitters, and fields >
Creating volume axis fields
Fields are forces that you use to animate the motion of particles. With a Volume Axis field, you can move particles in various directions within the volume of a cube, sphere, cylinder, cone, or torus. With clever use of this type of field, you can create effects such as particles flowing around obstacles, solar flares, explosions, tornadoes, and rocket exhaust.
In the next steps, you’ll use a volume axis field to move the particles up a conical path. When the particles exit the top of a conical region, you’ll use another volume axis field to give them a downward arcing motion within a torus. The result resembles a fountain of light.
To create a cone volume axis field
 .
.
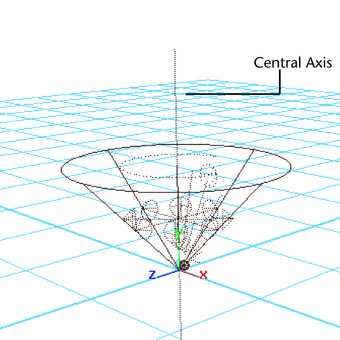
This creates a conical Volume Axis field that affects the motion of particles that enter or exist within its volume. Particles move in relation to a central axis within the volume. For a Cone Volume Shape, the central axis is the positive Y axis:
Using the axis attributes, you can specify that the particles:
By setting Along Axis to -1, the particles move toward the point of the cone. (A positive value would move particles in the opposite direction.) In the next step, you’ll flip the cone 180 degrees so the aim of the cone and particles is upward.
By using 0 for the Away From Axis value rather than the default value of 1, the particles will not radiate away from the axis.
Note that you can use larger or smaller values for the Axis attributes to intensify or diminish movement.
Magnitude specifies the strength of the volume axis field. The greater the value, the more force is exerted on the particles.
You’ll typically need to experiment with various Volume Axis field attribute values to achieve a desirable motion for particles. Be aware that small arrow-shaped icons within the Axis Field icon show which direction the particles will go.
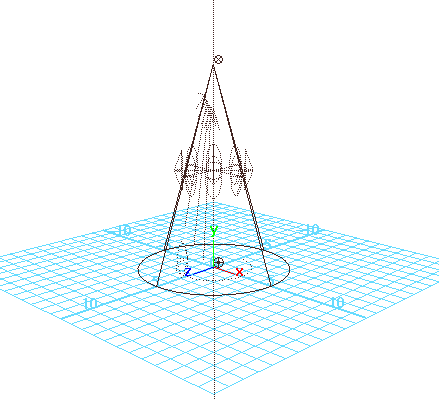
This positions, rotates, and scales the volume axis field so that its base lies on the same plane as the circle emitter. Even though the circle emits particles in random directions, the volume axis field will redirect their motion up the cone.

When the particles move out of the conical region, they continue in the same direction, mirroring the pattern of movement within the conical region. The volume axis field no longer controls the motion, but the particles continue with the same speed and direction they had at the moment they exit.
To create a torus volume axis field
.
The Torus Volume Shape creates a volume shaped like a doughnut.
Section Radius defines the thickness of the torus.
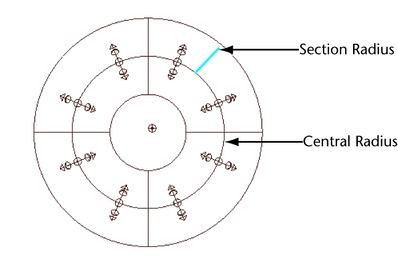
A value of 2 for Around Axis causes the particles to swirl around the central axis. For a torus, the central axis is the ring in the center of the solid part of the torus.
A value of -0.7 for Away From Axis causes the particles to move radially toward the central axis.
When you later play the animation, the combination of these values cause the particles to loop up then down as if guided along the inner walls of a torus.
Again, achieving the desired motion for particles within a volume axis field requires experimentation with attribute values. Examine the arrows and other small icons within the axis volume field to help get the desired results.
Note that the field’s effect is pervasive enough that all particles passing through the hole of the torus are influenced by the field. You can cause particles to pass through the hole by altering the Max Distance and Attenuation.
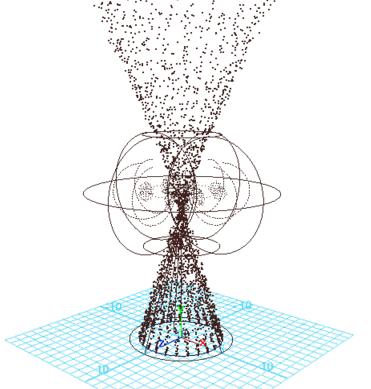
This moves the torus volume field up 15 units and scales it larger. Finding the appropriate position for the volume axis field is a matter of experimentation.
When the particles move through the top of the cone region, they spread outward somewhat but do not follow the shape of the torus volume field as specified in the prior steps. You’ll correct this situation in the next steps.