Add reflections, refractions,
and shadows
You
can turn on reflections, refractions, and shadows when you software
render Clouds, Tubes, and Blobby Surfaces.
To turn on reflections, refractions,
and shadows
- Select the particle object.
- In the Render Stats section
of the Attribute Editor, turn on:
- Visible In Reflections
- Visible In Refractions
- Casts Shadows
You must use ray tracing
to create reflections and refractions. You can use ray tracing or
depth map shadows to create shadows. See Rendering for details.
TipIf you’ve created clouds, tubes, or blobby
surfaces in your scene and are not currently working with them,
you can speed up software test rendering by selecting the particle
object and turning off Primary Visibility.
Use lights with moving
particles
By default, all particles are evenly lit,
regardless of where you place lights in the scene. For some effects,
you might want moving particles to drift in or out of the lighting,
disappearing when not illuminated.
For example, you might
want cigar smoke rising under a lamp to show only when it passes
through the lighting. Or, you might want rain to show only when
it passes beneath a street light or in front of the headlights of
a car.
If you use Streak, Point, MultiStreak,
and Multipoint render types, you
can use lights to create these effects.
To use scene lighting with particles
- Add a spot light, point light, or directional
light to your scene. A spotlight gives the most obvious effect.
See the Lighting guide for details on
adding lights.
- Aim the light at the particles.
- Select Lighting > Use All
Lights.
- Select Shading > Smooth
Shade All.
- Select the particle object you want to
light.
- In the Attribute Editor,
set the Particle Render Type to Streak, Point, MultiStreak,
or Multipoint.
- Click the Add Attributes For Current
Render Type button.
The default render attributes
are displayed in the Attribute Editor.
- In the Render Attributes section,
turn on Use Lighting.
- To maximize particle illumination, set Normal
Dir as follows:
- Set to 1 if most or all particles are
moving towards the light. Example: smoke rising toward a light.
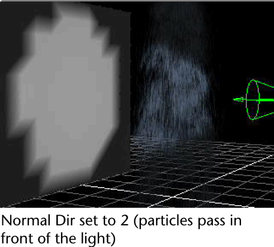
- Set to 2 if most or all particles are
stationary or passing in front of the light. Examples: rain passing
in front of headlights, or stationary particles creating a glow
around a point light.
- Set to 3 if most or all particles are
moving away from the light. Example: rain falling down past a street
light.
- From the Hardware Render Buffer window,
select Render > Attributes.
- In the Render Modes section
of the Attribute Editor, select All
Lights from the Lighting Mode pull-down
menu.
- Hardware render the scene to see the
effect.
NoteSometimes, unlit
particles may appear brighter than lit ones when viewed in the hardware
renderer. To fix this problem, substitute the particle type with
small radius spheres.
TipIf the particles
aren’t illuminated as expected, make sure the light points at the
particles. Also, position and rotate the camera so your view of
the particles is from behind the light. Because changing the Normal
Dir setting is convenient, it’s often fastest to simply
try each setting and see which looks best. If you use stationary
particles with Normal Dir set to 1 or 3, the
particles won’t be displayed.
