


Learning Resources > Tutorials > Getting Started with Maya > Painting > Lesson 3: Painting textures
on surfaces >
Painting a bump map texture
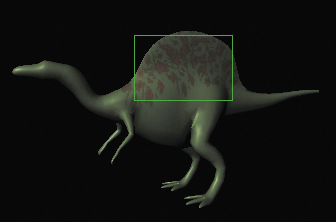
Next, you’ll paint a bump pattern on Dino. In Maya, a bump texture creates the illusion of surface relief. It does this by perturbing the surface normals to make the surface appear bumpy. This is useful for making Dino’s skin appear more “reptile-like”.
The Assign/Edit Textures window appears.
Earlier in the lesson, your painting affected only the Color attribute. To paint bumps, it’s necessary to select a BumpMap as the new attribute you want to paint, and then assign a new texture for the bumps you’ll create.
Maya creates a file texture and applies it to the Bump Map attribute of the DinoSkin material.
In the scene view, Dino’s color changes to white. Bump map textures are based on grayscale colors. By default, when you create a rendered image, bumps will appear in the areas of the surface where there is significant grayscale color contrast. For instance, if a region has black and white stripes, you’ll see grooves there. Regions with little or no contrast display no bump.
The bumps will not show in the scene view; you must create a rendered image in order to see them. The same is true when you paint certain other attributes, such as Transparency and Incandescence.
Before you paint bumps on Dino, you must set up the Maya panels so you can interactively see the results of your strokes in a rendered image.
Maya now displays the perspective view, the Render View, and the 3D Paint Tool settings. With this arrangement, you’ll be able to see your strokes render as you paint.
This region will update when you paint.
For the IPR renderer to render bumps as you paint, you must update the bump map texture after each stroke. You can set this to occur automatically.
For a grooved bump effect, you need to change the brush shape.
Notice the Render View updates with each stroke.
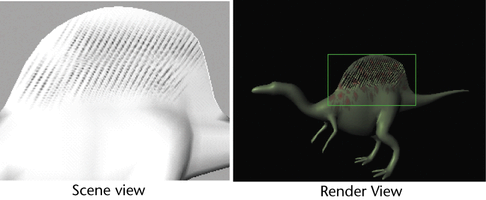
The bumps appear as grooves in Dino’s surface because you painted contrasting black stripes on the white texture. In general, gray or black over a white background results in bumps that appear indented.
If you wanted bumps that appear raised on the surface, you could start with a black background and paint gray or white over it. For example, you could flood the texture with a black Flood Color, then paint white or gray strokes rather than the default black.
Greater contrast between the background color and the color you paint results in deeper-looking bumps. Less contrast results in more subtle bumps. In the previous step, you painted using a black color, resulting in prominent bumps. If you change the Color setting to a light gray and paint on the white background, only subtle bumps will appear.