Learning Resources > Tutorials > Getting Started with Maya > Painting > Lesson 1: Painting in 2D
using Paint Effects >
Blending brushes
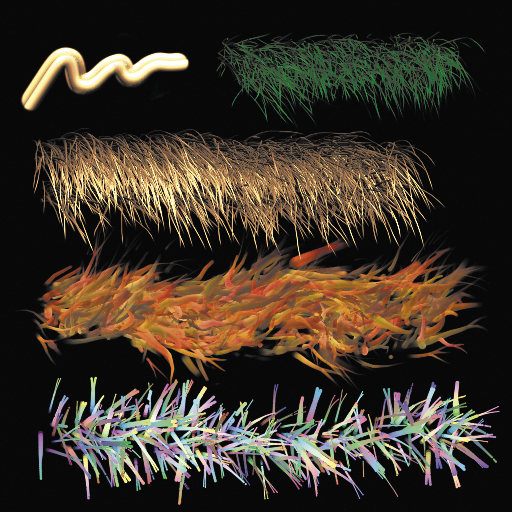
You can blend brushes. Before beginning, display the Visor, click gold.mel in the metal folder, and paint on the canvas so you know gold’s effect. Do the same for grassOrnament.mel from the grasses folder.
 .
.
The Preset Blending options window appears.
The brush preset blending is toggled on and the options in this window set how much the template brush is influenced by the next preset brush you select. This affects only the subsequent painting, not the preset brushes in the Visor.
When you select the next brush (gold.mel), Maya uses 80% of its shading and 0% of its shape. Conversely, the stroke uses 20% of the grassOrnament.mel brush’s shading and 100% of its shape.
If the Brush Preset Blend window is open, each time you select a preset brush, its Shading and Shape values will be blended with the template brush.