


Learning Resources > Tutorials > Getting Started with Maya > Rendering > Lesson 3: Lights, shadows,
and cameras >
Editing light attributes
Spot lights, directional lights, and other light types have several unique attributes (for example, Intensity, Dropoff, Color, etc.). In the next steps, you modify some of the attributes for the spotlight.
To modify the attributes of a spotlight
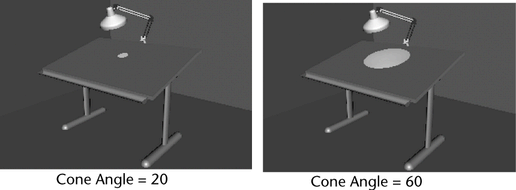
The circle of light widens. Rendering creates this result:
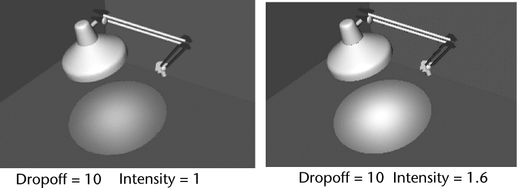
This attribute sets how much the light intensity diminishes from the center of the circular region out to the edge. Finding the right value is a matter of experimentation. When you increase the Dropoff, the light’s intensity diminishes, so you need to increase the Intensity. For example, increase the Intensity to 1.6. Rendering creates this result:
To mimic the way a light source’s intensity naturally decreases with distance, you might want to select a Decay Rate to diminish the light’s intensity. The Linear setting diminishes light with the least abruptness, Quadratic with the most abruptness. Cubic is between the two other settings.
The default setting is No Decay, which means the light remains at full intensity regardless of distance. If you use a setting other than No Decay, you likely will need to increase the Intensity. For this lesson, leave the Decay Rate set to No Decay.
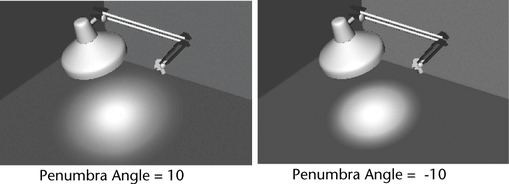
This attribute controls the softness along the edge of the area of illumination provided by the light. Again, finding the right value is a matter of experimentation. You can also use negative numbers to fade inward from the circle’s edge. The viewing angle of the camera influences the appearance of the fading at the edge. Rendering creates this result:

This gives the appearance of the light beams illuminating fog or dust in the air. Rendering creates this result:
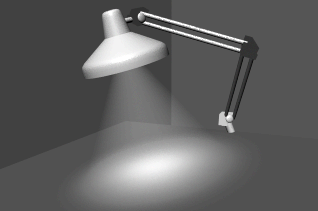
Fog is more noticeable when you view (render) the light beam from a side angle rather than from above the light fixture.
When you click the Light Fog map button, Maya creates a light fog node and displays its attributes in the Attribute Editor.
The Color and Density attributes are useful for altering the fog’s hue and transparency. These attributes affect only the light on its way to the surface, not the light on the surface.
In the scene view, you’ll also notice a Light Fog icon extending from the spotlight icon. When highlighted, it looks like this:
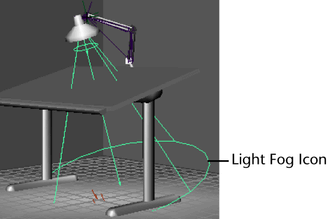
The icon displays the region of the potential illumination. You won’t see light fog under the table. The table blocks the light fog because you previously turned on spotlight’s Depth Map Shadows attribute. You can use the Scale tool on the icon to expand or contract the region of the illumination effect.