


Learning Resources > Tutorials > Getting Started with Maya > Animation > Lesson 5: Inverse
kinematics >
Applying IK to a skeleton
hierarchy
IK allows you to control the joint rotations in a skeleton using an IK handle. You pose the skeleton by positioning the IK handle (usually located at the end extremity of the skeleton) and having the rotations for the other joints calculated automatically by the IK solver. In the steps that follow, you apply IK to the skeletal hierarchy.
To create an IK handle for the mechanical arm
 .
.
The IK Handle Tool Settings window for the Joint Tool appears. When the mouse pointer is in the orthographic view its appearance changes to the tool's cross hair cursor.

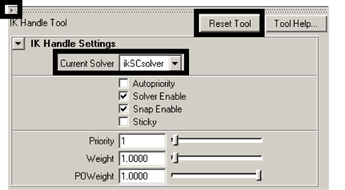
The ikSCsolver setting selects the IK Single Chain Solver. This solver ensures that the joints in the skeleton will lie along a single plane. This solver is well suited for the mechanical arm, because the arm doesn’t need to twist, unlike a real arm.
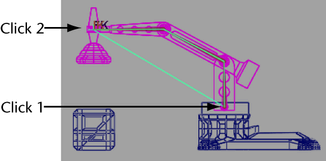
In the side view, the IK handle is drawn as a line from the start and end joints of the IK chain.
In the Hypergraph, two new nodes appear in the hierarchy that represent the IK chain: an IK Handle node and an end effector node.
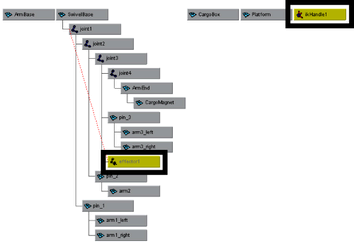
The IK Handle (in combination with the end effector) is used by the IK solver to calculate the rotation of the joints in the IK chain. By default, the IK Handle is located at the last joint of the IK chain in the scene view.
When you drag the manipulator, the skeleton and mechanical arm model are repositioned.
The next steps describe how to manipulate the IK Handle using a control object.