


Learning Resources > Tutorials > Getting Started with Maya > nCloth > Lesson 3: Creating nCloth
Clothing >
Painting nCloth properties
In a real dress, the area around the breasts (the bodice) is often made of a stiffer material to ensure the cloth does not hang loose. In order to simulate a bodice on your nCloth dress you will use the Paint Vertex Tool to paint Input Attract values on specific areas of the dress.
Maya automatically plays back the nCloth simulation and saves it to disk as a cache.
The dress now maintains its shape. This is because the Input Mesh Attract value you set in step 3 makes the nCloth mimic the shape of its input mesh. The input mesh is the original polygon mesh from which the nCloth dress was created.
 .
.
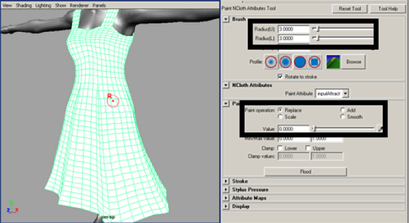
In the Tool Settings Editor, the Paint nCloth Attributes Tool becomes the current tool.
Move the cursor to the dress and you will notice that the cursor becomes an artisan brush.
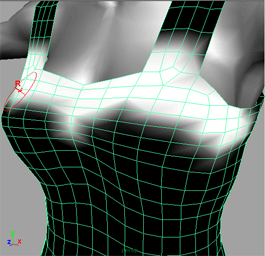
Notice that the portion you paint over turns black. Black regions of the dress indicate an input attract value of 0 meaning that those areas will be fully dynamic when the simulation is played back. Conversely, white regions indicate an input attract value of 1 meaning those areas will remain identical to the input mesh throughout the simulation.
Maya automatically plays back the nCloth simulation and saves it to disk as a cache.
The dress now maintains its shape everywhere except those places which you painted with the cursor. This is because the areas that you painted now have an input attract value of 0, making them fully dynamic.
The entire dress turns black indicating that a value of 0 has been applied to the Input Mesh Attract attribute for the entire dress.
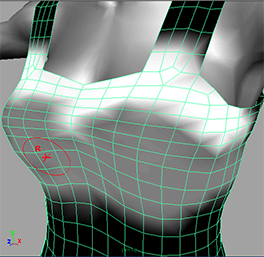
Make sure to dolly and tumble the camera to ensure you have painted the entire top of the bodice.
Maya automatically plays back the nCloth simulation and saves it to disk as a cache.
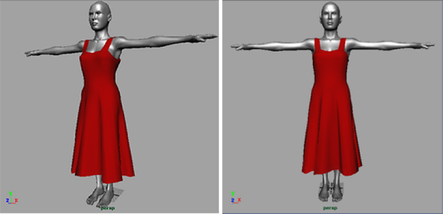
The dress now appears to be made of a light silk, except around the bodice where it maintains its shape. If your dress does not appear as the example below, you may need to increase the values painted on your bodice.
This completes the first half of the nCloth clothing lesson. In the second half of the lesson you will work with an animated character.