Learning Resources > Tutorials > Getting Started with Maya > Fluid Effects > Lesson 1: Creating a dynamic
2D fluid effect >
Adding a fluid emitter
to a container
Fluid emitters create fluid property values and emit them into containers as the simulation plays. The emitter controls the position, rate of emission, and turbulence forces applied to the fluid properties when they are created. After fluid property values are created, the attributes of the fluid container control their appearance and behavior.
You can add multiple fluid emitters to containers. You move fluid emitters the same way you move any geometry (for example, by setting keys).
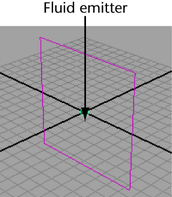
To add a fluid emitter to the container
Maya creates a fluid emitter called fluidEmitter1 and places it at the center of the fluid container.
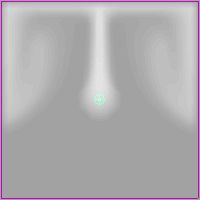
The fluid emitter creates Density values and emits them into the container.
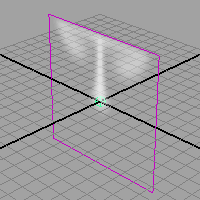
The white in the container represents Density. Density is the substance of the fluid and the visible fluid property. Where the Density values are highest, the Density appears more opaque.
Notice that the Density rises to the top of the container and moves along the boundary of the container, eventually flowing down the sides. Forces built into the container are acting on the Density values, causing them to change. The fluid collides with the boundaries rather than penetrating them.