Set up muscle attach points


The Maya Muscle plug-in provides a way to easily generate locators stuck onto the surface of NURBS or polygon mesh objects, even if they deform. This lets you generate a regular object that is effectively always on the surface point of the mesh as it moves. You can use these objects to parent muscle controls to, or when specifying the Attach object in the Muscle Creator or Muscle Builder windows.

To generate an attach point for a NURBS muscle or object

  1. Right-click a NURBS object or muscle and select Surface Point from the marking menu that appears. (For polygons, select Polygon Faces instead of Surface Points.)
  2. Select one or more surface points to use as the attach point(s). (For polygons, select a polygon face, or two opposing edges.)
    NoteYou can also select two opposing edges to manually select which edges the attach locator uses. If you have selected two edges, you get one attach locator between them. If you select four edges, you get two locators, one for each pair in the order they were selected.

  3. Select Muscle > Bonus Rigging > Surface Attach.

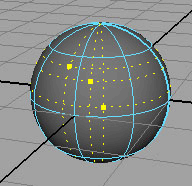
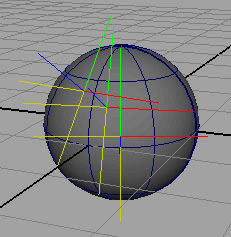
    A Muscle Surf Attach node is created, and you have color-coded locators for each surface point. These locators stay attached to the surface of the NURBS object even if it deforms.

  4. You can adjust the u Loc and v Loc attributes in the Channel Box or Attribute Editor to change the u/v location of the locator on the surface of the object.
    NoteIf your polygon attach locator appears to flip or move diagonally, select the locator and set the Fix Poly Flip attribute to on in the Channel box.

Related topics