Learning Resources > Tutorials > Getting Started with Maya > Maya Basics > Lesson 4: Components and
attributes >
Template display
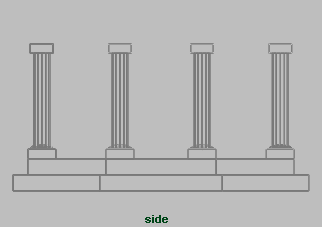
When your scene becomes complex, templating the display of some of the objects in your scene allows you to more easily select only the objects you want. When you template the display of an object, its wireframe changes to a gray color. The object(s) can still be seen, but not easily selected. This helps to prevent you from selecting or modifying it accidentally. You can change the display of objects to a template and use them as a modeling reference (the way a grid is used).
You need to change the display of the base and columns to template mode so that you can more easily work on the temple roof.
To template the base and columns
The selected objects become templated.
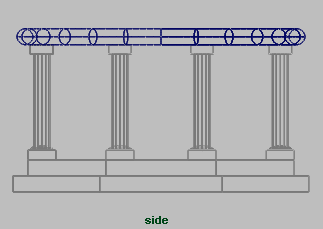
For your classic temple, you need to create the entablature using a torus primitive. An entablature is a structure that lies horizontally upon the columns of a temple and supports the roof.
To create and position a torus primitive for the entablature
 .
by first
selecting
Create > NURBS Primitives > Interactive Creation.
.
by first
selecting
Create > NURBS Primitives > Interactive Creation.