Show in Contents

Add to Favorites

Home: Autodesk Maya Online Help

Workflow for mapping characters

Map one character to another

Redirect the motion of an animated character

Map one character to another
For more information
on mapping character animation, see
Character > Character Mapper.
To map animation from one character to
another
- Select
Character > Character Mapper.
- Select the root joint of your source character.
- In the Character Mapper window,
click Load Source.
- Select the root joint of your target character.
- Click Load Target.
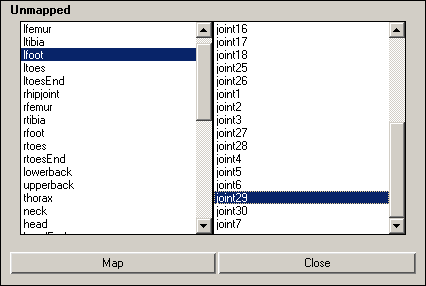
- Select one node or attribute from the
left unmapped column, and select its corresponding node or attribute
in the right column. For example, if the left ankle joint for your
source character is lfoot and the left ankle joint of
your target character is named joint29, then
your selection would resemble the following:
- Click Map.
- Repeat steps 6 and 7 until you have mapped
all the nodes or attributes from the source and target characters.
Now you can copy and
paste animation clips between the mapped characters in the Trax
Editor.
To map animation from one character to
another based on hierarchy
- Select the root joint of your source
character.
-
 -click
to select the root joint of your target character.
- Select
Character > Character Mapper.
- Do one of the following:
- In the Character Mapper,
select Edit > Map based on hierarchy.
- Select a node or attribute from both
the Source and Target character.
- In the Character Mapper,
select Edit > Map based on hierarchy.


 -click
to select the root joint of your target character.