sculpt


Sculpt History

Mode

Specifies the sculpt deformer’s mode.

Flip

With Flip, a deformation occurs when the sculpt tool nears the target object’s geometry. Also, Flip places the implicit locator at the center of the sculpt tool. This mode is called Flip because when the center of the sculpt tool passes through the surface, the deformed surface flips to the other side of the sculpt tool.

Project

With Project, the sculpt deformer projects the target objects geometry onto the surface of the sculpt tool. The extent to which the projection takes place depends on the sculpt deformer’s Dropoff Distance attribute. Also, the Max Displacement attribute specifies whether the projection occurs directly on the sculpt tool, inside the sculpt tool, or outside of the sculpt tool.

Stretch

With Stretch, when you move the sculpt tool away from the geometry, the affected surface of the geometry stretches or bulges to stay with the sculpt tool. The stretch direction extends from the point marked by the stretch origin locator to the surface of the sculpt tool’s shape.

Inside Mode

Specifies how the deformer influences the deformable object’s points located inside the sculpt sphere.

Ring

This mode pushes inside points outside of the sculpt sphere, creating a contoured, ring-like effect around the sculpt sphere.

Even

This mode spreads the inside points all around the sculpt sphere evenly, creating a smooth, spherical effect. Default is Even.

Max Displacement

Specifies the distance that the sculpt sphere can push a deformable object’s points from the sphere’s surface. Use the slider to select values from -10.000 to 10.000. Default is 0.100. Max Displacement uses the Working Units that you set in the Maya Settings/Preferences.

Dropoff Type

Specifies how the sculpt sphere’s range of influence declines or drops off. The range of influence is specified with the Dropoff Distance.

None

Specifies no decline, providing a sudden dropoff effect.

Linear

Specifies a gradual decline, providing a dropoff effect that decreases linearly.

Dropoff Distance

Specifies the sculpt sphere’s range of influence. Note that Dropoff Type specifies how the range of influence can decline. The effect can depend on the deformer’s Mode attribute setting. For instance, if Mode is set to Project, see Project.

Add Advanced Sculpt Attribute

With the Advanced Sculpt Attributes you can use 2 dimensional textures to control the strength of the deformation field that surrounds the Sculpt object. This lets you deform geometry in a non-uniform manner.
Enable Advanced

When on, the Advanced Sculpt Deformer Attributes are active. When off, the Advanced Sculpt Deformer Attributes are inactive.

Texture

Lets you set a 2D texture to drive the strength of the sculpt deformer. The texture coordinates are assigned to the sculpt object in the same manner as a similarly oriented NURBS object.

Texture Multiplier

Sets the strength of the 2D texture’s influence on the deformation.

Non Uniform

When on, Maya normalizes the sculpt deformation. Turn on this attribute if you want to compensate for any non-uniform scaling that may have been applied to the target object or the sculpt deformer.

Visualize Texture

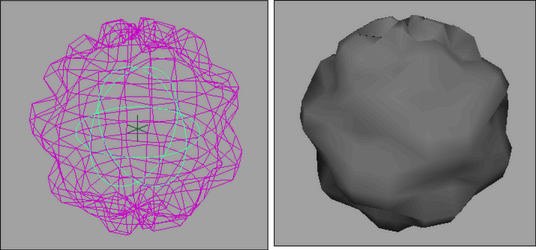
When on, the objects influenced by the deformer are displayed in wireframe, and the deformer itself is displayed in textured mode. This lets you see the texture that is being used, and is useful when painting deformation textures.

Paint Sculpt Map

Opens the 3D Paint Tool for you to paint deformation strengths over the surface of the deformer. Also, Paint Sculpt Map creates a new file texture and connects it to the sculpt deformer’s Texture attribute. If a non-file texture is connected to the deformer, clicking this button will disconnect it.

Note
  • When painting a sculpt map, make sure that the 3D Paint Tool attribute your are painting is Color. Otherwise, the values you paint will have no affect on the sculpt deformation. You can set which attribute to paint from the Attribute to Paint drop-down menu in the File Textures section of the 3D Paint Tool settings.
  • You can adjust the resolution of the sculpt map with the 3D Paint Tool resolution controls.

For more information, see Texturing > 3D Paint Tool in the “The 3D Paint Tool” chapter of the Paint Effects and 3D Paint guide.