Creates a directional light that illuminates in one direction without having an obvious source of light in the scene.
Directional lights have color, intensity, and direction, but no obvious source in the scene. Use directional lights to simulate very distant light sources. For example, the sun can be considered a directional light since it is far enough away that light rays reaching the earth are effectively parallel. Directional lights do not decay with distance.
Because directional lights only have a direction, their location in a scene is unimportant. This also means that during raytracing they can cast shadows on objects behind their apparent location in a scene.
You can create a light using the Create light tools or using the Multi-lister. You can use the light options to set properties for any new light you create.
By default, lights are named sequentially as you create them: Light, Light#2, and so on. To avoid confusion, however, you should name all lights as you create them. If you let the system assign default names and later combine two or more files, all lights are renumbered to avoid duplicate names. It may then become difficult to distinguish lights by name.
To create a light using the Light tools

If shelves are not visible choose Windows > Shelves .
.
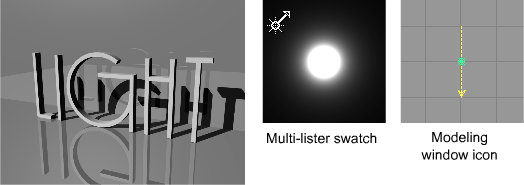
A new light swatch appears in the Multi-lister, and a new light icon appears in the modeling window. Each type of light has a unique modeling window icon and Multi-lister swatch.
In addition, light manipulators are displayed in the modeling window.
(To display the manipulators for an existing light, select the Pick > Object tool, select the light, and select a Light tool.)
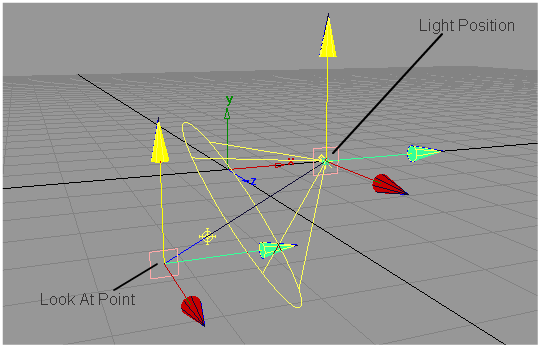
Most lights have one manipulator that controls the light’s position. Spot lights have two manipulators: one manipulator controls the light’s position, the other manipulator controls its direction (look-at point). Each manipulator consists of a square icon at its center, and three colored arrow icons radiating from the center in the X, Y, and Z directions.
By dragging a square icon you can move the light or the light’s look-at point across the view plane (in orthographic windows)
or parallel to the ground plane (in perspective windows). By holding the  (Windows) or
  (Mac) key while you drag a square icon you can snap the light to grid points.
By dragging an arrow icon you can move the light or the light’s look-at point in the X, Y, or Z direction.
To create a light using the Multi-lister
The Directional Light Options can be opened using the Directional light tool.
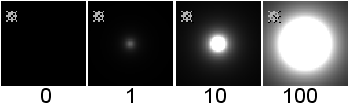
The brightness of the light. If the light exerts a force, this value sets its strength. A light with an Intensity value of 0 produces no light. A light with negative Intensity value removes light from a scene in the area of the light’s influence. The slider range is 0 to 100. The default value is 1.