Choose which tools appear on your marking menus.
 .
.
 -drag tools onto a shelf in the window to add them to the corresponding marking menus.
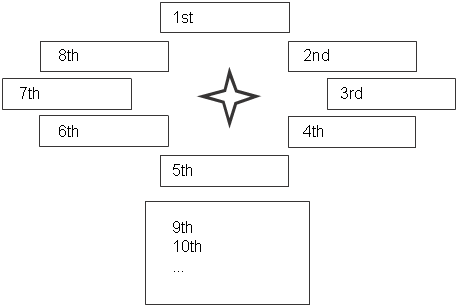
The order of the tools on the marking menu shelf controls what position they occupy on the marking menu:
Remove a tool from a marking menu
.
-drag the tool to the trash can icon.
Rename a tool on a marking menu
.
 (Windows) or
  (Mac) and double-click the tool icon.
Swap marking menus between mouse buttons
.


