Create a brush that paints a captured brush stamp
To create a texture brush
- Select the brush style you want to start from—for example, Solid brush, Airbrush, Pencil, and so on
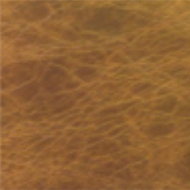
In this example we will create a simple leather texture brush, using a Solid Brush profile.
- First we scan our leather sample and save it in a standard image format like tiff.
- File > Import > Canvas Image
 the texture sample.
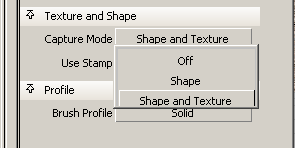
- Open the window and select the tab. Select the option from the pop-up menu.
You can also use the in the Panel.
- The brush cursor changes and the prompt line requests you to select the texture region. Note you can change the radius using
the standard modifier key if required. The moment you place a single click on the canvas, the texture is grabbed from the current image layer and loaded
into the brush stamp. Note how the tool’s icon, brush stamp and brush stroke preview have been refreshed in the Brush Options
window.
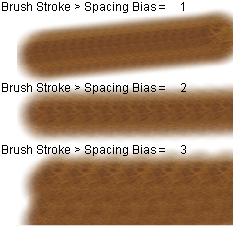
- Create a few sample strokes on the image layer to test the brush effect. You may need to modify the distance between each
stroke by adjusting the and the , depending upon your texture style and personal preference.