Applies an animation curve to a channel and modifies the time of an action.
All – The new time warp curve is applied to all currently animated objects.
Active – The new time warp is applied to all picked objects.
Sets – The new time warp is applied to all objects in the selected sets in the set lister. Choose Animation > Editors > Set Lister to display the set lister.
All – The new time warp is applied to every channel (every animation parameter that is currently animated) of the object.
Global or Local – The new time warp is applied only to the channels whose parameters are selected in the GLOBAL or LOCAL parameter control windows.
Choose Animation > Editors > Param Control to set different global or local animation parameters.
None – The new time warp is applied to only the selected objects.
Below – The new time warp is applied to the selected objects, and all objects below them in the hierarchy.
Defines where the first and last keyframe of the new time warp curve should be placed.
All – The range of all channels to which the time warp curve is applied is found, and the two keyframes at the minimum and maximum time of all the animation for this channel are created.
Option Window – The Start and End options are used to determine at what time to create its new keyframes.
When you choose the Option Window option, the New Time Warp Options window expands to display the following:
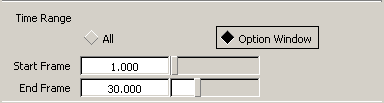
Defines in what time range the new time warp curve should be applied. These values are only used if the Time Range option is set to Option Window.


