Use Product
Data Quality checks in Evaluate > Check Model  to ensure that your model meets
minimum geometric requirements for import into a CAD system.
See Check objects for modeling problemsfor more information.
In order to achieve the desired results, some checks should be executed before others. As a general rule, the checks for duplicate geometry (Copies and Duplicates Within Tolerance) should be applied first, since duplicate or embedded geometry can falsify the results of continuity checks.
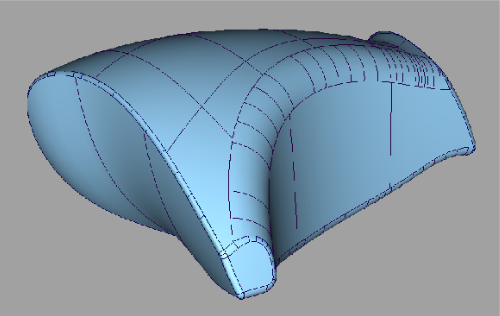
Below is a recommended workflow ideally suited to prepare the following model for import into ProEngineer.

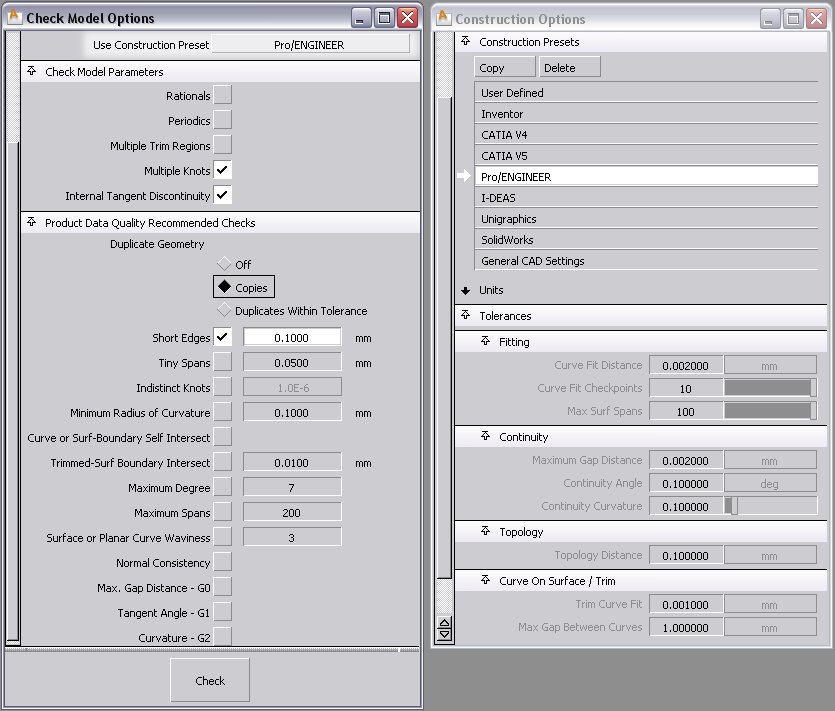
Choose the correct Construction Presets
All the construction tolerances are set to the proper Pro-Engineer values.

The above image shows the Check Model options on the left, and the construction tolerances for ProEngineer on the right.
Check the model for duplicate geometry
This check enables you to find both duplicate and embedded curves and surfaces in your model. Embedded geometry consist of curves and surfaces that duplicate parts of larger objects.
 option window.
This value represents the maximum distance allowed between two surfaces (or curves) for them to be considered duplicates. It is measured along the geometry’s normal.
The spreadsheet window appears, listing the geometry that failed the check on the left-hand side. This geometry is either a duplicate of, or embedded in, the geometry shown in the corresponding columns (labeled Tolerance Duplicates and Embedded In). The names of curves or surfaces that are duplicates of each other are all prefixed by the same number.
The corresponding geometry is highlighted while you press the mouse button. To have the geometry selected permanently, choose Pick > Pick Selected in the spreadsheet menu.
Our example shows one duplicate and one embedded surface.
To select the duplicate, choose Pick > Pick Tolerance Duplicates in the spreadsheet menu.

Check the model for continuity between curves and surfaces
Now that the redundant geometry has been removed, we can proceed with the continuity check.
 option window.
Notice that the check for positional continuity (Max. Gap Distance) was turned on automatically, since geometry must pass the positional continuity test before tangency can be checked. Similarly if the Curvature check was selected, the tangency and positional checks would be turned on automatically.
 for the specific construction
preset selected in the Check Model Options window.
The spreadsheet window appears, listing the geometry that failed the checks on the left-hand side. The G0 and G1 columns display a mark showing which continuity check failed.
In the viewing window, discontinuous boundaries are highlighted, and the letters P, T or C indicate the type of discontinuity (Positional, Tangent or Curvature).

Check the model for short edges
This check identifies surfaces with short edges. Short edges are surface boundaries that are legal in Alias, but may be problematic if used in certain operations, or illegal in other systems into which the model will be imported.
For example, the Offset tool could reduce a 0.1 mm boundary to 0.0 mm, thereby creating a degenerate surface not valid to be passed down to other systems.
As well, if a surface boundary is 0.01 mm in length and you are sending it to a CAD system where the tolerance for coincident points is 0.02 mm, then this surface will not be a legal entity in the CAD system.
To identify short edges:
 option window.
This value represents the minimum length that a surface boundary must have to pass the check. All shorter edges will be reported.
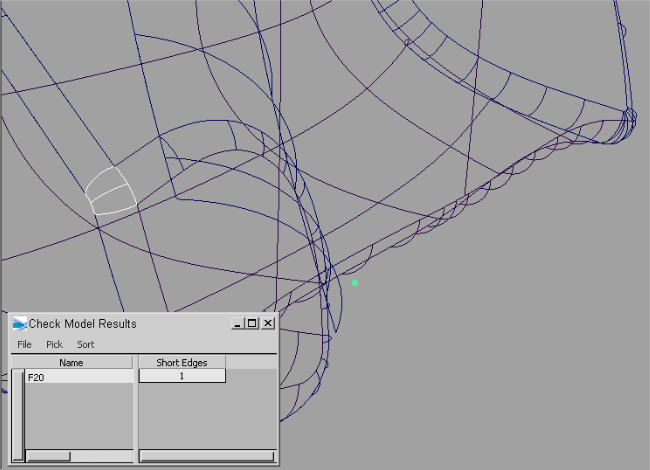
The spreadsheet window appears, listing the geometry that failed the check on the left-hand side, and the number of short edges in the Short Edges column.

Check the model for uniformity of surface normals
The Normal
Consistency check looks for geometry whose normal direction
is different from the direction of the majority of the surfaces
in the topology being checked. A topology is a group of surfaces
whose boundaries are within the Topology Distance shown
in Preferences > Construction Options  for the construction preset
selected in the Check Model tool (Pro/ENGINEER
in this case). These surfaces are considered to be adjacent to each
other.
To find inconsistent normals:
 option window.
The spreadsheet window appears, listing the geometry that failed the check on the left-hand side, with a mark in the Flipped Normal column.
In the viewing window, inconsistent normals are shown as arrows with the letter “N”. In our example, one such surface has been identified.
