The Alias installation
wizard contains all installation-related material in one place. From
the installation wizard, you can access installation documentation,
install the products, and install supplemental tools.
To install Alias using default values
on a stand-alone computer
This
is the fastest means of installing Alias on a single, stand-alone
system. The installation performs the following:
- Uses a Typical installation, which installs
the most common application features.
- Installs Alias to the default install
path of C:\Program Files\Autodesk\Alias 2011.
- Installs Alias for
Inventor to the add-ins directory of your Inventor installation.
- In the Alias installation wizard,
click Install Products.
- Review the Products to Install list.
Click Next.
NoteIf certain components
are already installed, or have installation requirements that are
not met, they will be unchecked and greyed out.
- Review the Autodesk software license
agreement. Click I Accept, and then click Next.
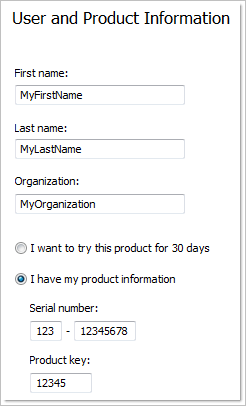
- On the User and Product Information page,
enter your user information, serial number, and product key. You
can also choose to install as a Trial and enter this information
later. Click Next.
NoteAfter you click Next,
you cannot change the information entered on this page unless you
uninstall the product. Make sure you enter the information correctly.
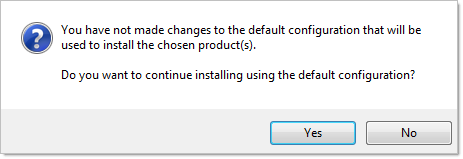
- On the Begin Installation page, select
Install, then select Yes to the configuration warning message. This
will install the product with the default configuration.
- On the Installation Complete page, you
can view the installation log and Alias Readme.
- Click Finish.
To install Alias using customized values
on a stand-alone computer
With this method, you
can customized your installation.
- In the Alias installation wizard,
click Install Products.
- Review the Products to Install list.
Click Next.
NoteIf certain components
are already installed, or have installation requirements that are
not met, they will be unchecked and greyed out.
- Review the Autodesk software license
agreement. Click I Accept, and then click Next.
- On the User and Product Information page,
enter your user information, serial number, and product key. You
can also choose to install as a Trial and enter this information
later. Click Next.
NoteAfter you click Next,
you cannot change the information entered on this page unless you
uninstall the product. Make sure you enter the information correctly.
- On the Begin Installation page, select
the product or component to configure, then click Configure.
- On the Select the License Type page,
select the license type - Stand-alone or Network. Click Next.
- On the Select the Installation Type page,
you make the following configuration changes, depending on the component.
After making your choices, click Next.
- Add Location to Path - Additional
ways to access and use the software.
- Add a Shortcut to the Desktop/ Quick
Launch Toolbar. Clear the check box if you do not want to display
the shortcut icon.
- Select the Installation
Location - You can set the path where Alias is installed. The
default installation path is C:\Program Files\Autodesk\. During
installation, a product folder is appended to the path you specify.
For example, if you changed the installation path to C:\My Programs,
then Alias is installed to C:\My Programs\Alias2011
NoteDo
not rename the product folder, as this name is required for proper
operation, and do not use excessively long pathnames (many directory
levels), as their are limits in Windows for the length of pathnames.
See
What are the installation path length limitations? for
more information.
- Click another product tab to configure
another product, or click Next and then Configuration Complete to
return to the Begin Installation page. Then, click Install.
NoteIf you want a copy
of your configuration summary information, click the Copy to Clipboard
button.
- On the Installation Complete page, you
can view the installation log or Alias Readme.
- Click Finish.
You have successfully
installed Alias. You are now ready to register your product
and start using the program. To register the product, start Alias and follow
the on-screen instructions.

