In this section, you render your nParticle effect using the mental ray for Maya renderer. Since rendering a particle effect can take several minutes to an hour, in this lesson, you only render selected frames of the simulation. Rendering simulated frames is the easiest way to see how some attributes affect your simulation.
To prepare your scene for rendering, you assign mental ray mia_material_x shaders to the pitcher, glass, and water meshes. Lights have been created and placed in the scene so that realistic shadows and reflections appear in the rendered frame. The scene also includes a camera named renderCam that is positioned for the rendered view. For more information about rendering, see the Rendering and Render Setup guide.
To prepare your scene and workspace for rendering, you will do the following:
If you have not yet cached your simulation, do so now. See Cache your nParticle simulation.
To change the view arrangement and display hidden objects
The Hypergraph, Render View, and the current perspective view are displayed. This view arrangement makes it easier to assign shaders to your objects and to view rendered frames of your simulation.
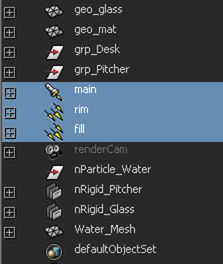
 -click the main, rim, and fill lights, then select Display > Show >Show Selection.
The lights used for rendering the simulation appear in the scene.
You now view the scene through the camera that you will use to render.