In this lesson you learned how to:
You can add hair to a NURBS or polygonal surface by creating or painting the hair. For polygons, UVs should be non-overlapping and fit between 0 and 1. Automatic mapping is a quick way to achieve this (see Automatic UV mapping in the Mapping UVs guide). For more information, see Creating hair in the Hair guide.
Before creating hair, you should determine which renderer you’ll be using as this will affect what type of hair output you select: NURBS curves or Paint Effects, or both.
While using interactive playback you can modify the hair and see the hair react to dynamic forces. For more information, see Play a hair simulation in the Hair guide.
Style hair by transforming hair curves and using Lock Length to maintain the length between CVs on a curve. You can also use Fields to style hair and then add constraints to hold hair in position. For more information, see Styling hair and modifying the hair look and behavior in the Hair guide.
You can change the look (color, curl, etc.) of the overall hair by modifying attributes in the hairSystemShape node. But individual follicle attributes can be modified in the follicleShape node, which override or blend with the hair system attributes. For more information, see the following topics in the online help: Hair system attributes (hairSystemShape in the Hair guide), Follicle attributes (follicleShape in the Hair guide) and Set up hair shading in the Hair guide.
Paint Effects hair can be rendered using the Maya Software renderer. You can also convert Paint Effects hair to polygons and render in another renderer, such as mental ray. Or you can output just the dynamic curves to an external renderer, such as Renderman. For more information, see Rendering scenes with hair in the Hair guide.
You can also create non-hair models and effects with Hair. Any NURBS curve can be made into a dynamic hair curve. In addition to creating long hair and hairstyles you can use hair curves to create:
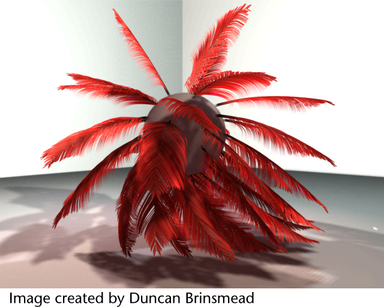
In addition you can assign a Paint Effects brush to a hair system as shown in the image below.
