Show in Contents

Add to Favorites

Home: Autodesk Maya Online Help

Lesson 4: Adjusting muscle length

Rigging muscles

Lesson 6: Mirroring muscles

Lesson 5: Sculpting muscles
You
can also edit a muscle’s cross section curves to sculpt the muscle
into the shape you want. The Muscle Creator sculpting
controls let you choose which pose state and axis to edit, and provide
sliders to help you adjust the muscle surface.
Note Make sure you select
the desired pose state before editing your muscle. If multiple states
are selected at once, changes you make on the muscle surface are
reflected in all selected states.
Open the scene for the
lesson
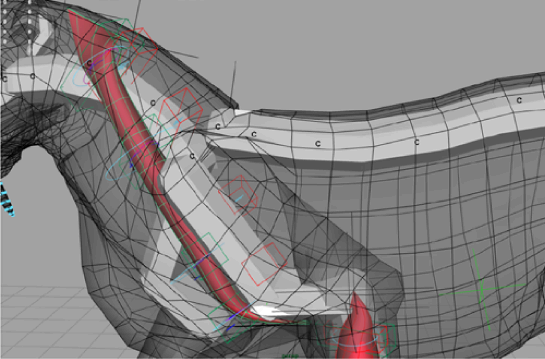
- Load the Sabertooth_Sculpt_Start.mb file.
This scene contains the
saber tooth tiger with capsulated bones, a front leg muscle, and
a neck muscle which has been set in all three pose states.
Sculpt muscles in each
pose state
- Open the Muscle Creator (
Muscle > Muscles/Bones > Muscle Creator)
and switch to the Edit tab.
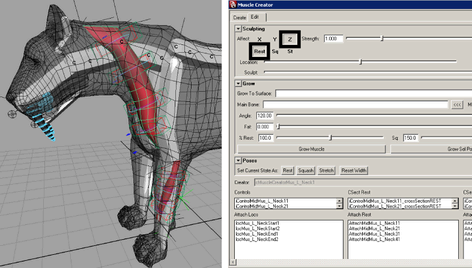
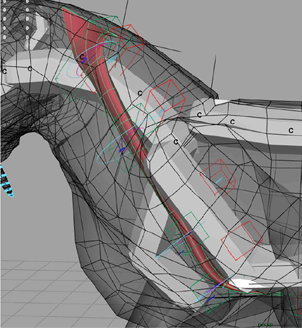
- Select the neck muscle.
The neck muscle in the
current rest state needs to be thinner on its Z-axis.
- In the Sculpting section
of the Muscle Creator, make sure only
the Z axis and Rest parameters
are selected.
- Drag the Sculpt slider
to the left until the muscle loses its tube shape and looks more
like a flat strip. Keep
the Rest parameter selected, deselect
the Z axis, and select the X axis.
- Drag the Location slider
to the left until it is under the St parameter
and drag the Falloff slider to roughly the
same position.
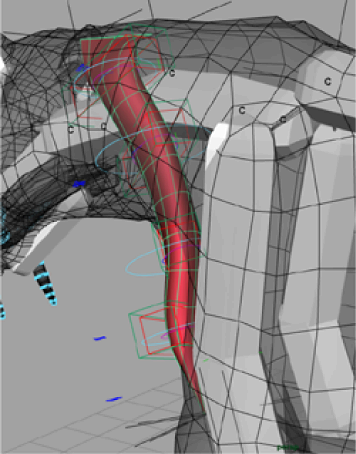
This isolates the cross
section curve at the top of the neck muscle that is slightly curved
inwards.
- Drag the Sculpt slider
to the right until the inward curvature disappears.
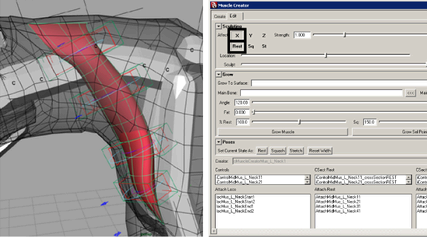
- Go to frame 17, where the neck muscle’s
stretch state is being pulled to its limit.
NoteBefore you sculpt
a muscle in a desired state, make sure you scrub to a frame that
best represents the muscle in that state. Otherwise, you may not properly
see the results of your deformations on your muscle surface.
- Drag the Location slider
to the middle and drag the Falloff slider
to the right. This sets the sculpting range at its maximum, so the
entire muscle length is affected.
- Select the Z axis and St parameters.
- Drag the Sculpt slider
to the left until the entire muscle is thinner.
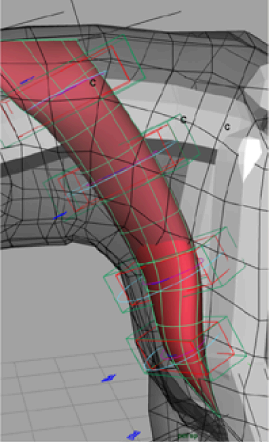
- Scrub the animation again to view your
sculpting changes.
Beyond the lesson
In this lesson you learned
how to sculpt a muscle in different pose states. You can find the
completed file for this lesson, Sabertooth_Sculpt_End.mb,
in the Maya Muscle Advanced Techniques folder.