Show in Contents

Add to Favorites

Home: Autodesk Maya Online Help

mental ray Custom text editor

Shading Windows and Editors

Hypershade

Connection Editor
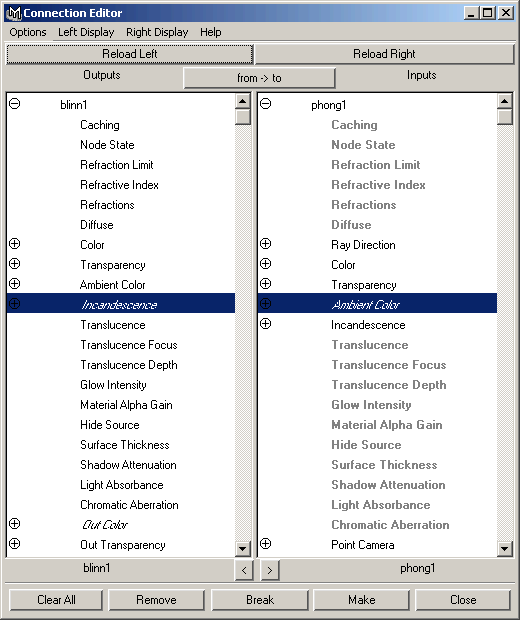
The Connection
Editor provides node network information in a side-by-side layout
where you can view two connected nodes in a node network. This editor
is useful for fine-tuning a shading network.
You can quickly and easily
traverse from node to node and show a node’s outputs or inputs to
facilitate connections, meaning you can make connections in either
direction in a node network.
NoteSome utility nodes
can only be connected to a material’s attributes through the Connection
Editor.
Connected attributes
in the Connection Editor appear in
italics (Mac OS X excepted),
while non-keyable attributes appear dimmed. Some dimmed attributes
indicate a nested list of attributes. Double-click the attribute,
or expand the attribute to view the connectable nodes.
To connect nodes with
the Connection Editor, see
Connect render nodes using the Connection Editor.
Connection Editor buttons
The Connection
Editor’s buttons control how connections are made.
- Reload Left and Reload Right
-
Loads a node into the
output or input panes of the Connection Editor.
Select a node, object, or shader and click Reload
Left or Reload Right.
- from -> to
-
Switches the output attributes
to input attributes, and the input attributes to output attributes.
- Arrow buttons (

 )
)
-
Moves the output node
into the input pane ( ), or
moves the input node into the output pane ( ).
- Clear All
-
Removes the nodes from
the output and input panes.
- Remove
-
Removes the
node in the output pane.
- Break
-
Breaks the
selected connection. Select the connection you want to break from
the output pane, then click Break. This
button is only available when the Auto-connect option
is off.
- Make
-
Makes a
connection between the selected attributes. Select an output attribute,
and select an input attribute, then click Make. This
button is only available when the Auto-connect option is
off.
- Close
-
Closes the Connection
Editor.
Connection Editor menu
bar
- Options > Auto-connect
-
Causes a connection to
be created automatically, when you select an output attribute and
an input attribute. This option is on by default.
- Options > Channel Names
-
Changes the way the attributes
are displayed in the Connection Editor. The Nice setting
displays the names in the most readable manner with leading capitalizations
and spaces. The Long setting displays the attributes
in the same manner as nodes are displayed. The Short setting
displays names as short forms, for example, Bounding
box displays as bb.
- Options > Attribute Order
-
Changes the order in
which the attributes are displayed in the Connection Editor’s
list. Attributes can be sorted in ascending or descending alphabetical
order.
- Left Display > Show Readable and Right Display
> Show Readable
-
Displays all the attributes
for the node, regardless of whether the attribute is keyable or not.
This option is on by default.
- Left Display > Show Outputs
Only and Right Display > Show Outputs Only
-
Displays only the output
connections for the selected node.
- Left Display > Show Inputs
Only and Right Display > Show Inputs Only
-
Displays only the input
connections for the selected node.
- Left Display > Show Non-Keyable and Right Display
> Show Non-Keyable
-
Displays the non-keyable
(attributes you cannot create connections for) attributes of the
node. This option is on when the Show Readable option is on.
- Left Display > Show Connected
Only and Right Display > Show Connected Only
-
Displays only the attributes
that have connections.
- Left Display > Show Hidden and Right Display
> Show Hidden
-
Displays hidden attributes
for the node.