The Garment Maker modifier works on spline patterns. It does two main things:
Use the Garment Maker Modifier to Prepare the Pullover
 open the file fashion_model01.max.
Apply Garment Maker to make the pullover pattern into a cloth-style mesh:
 (Maximize Viewport Toggle) so you can see all four viewports.
 select the pullover pattern.
 Modify panel, open the Modifier List, and choose Garment Maker.
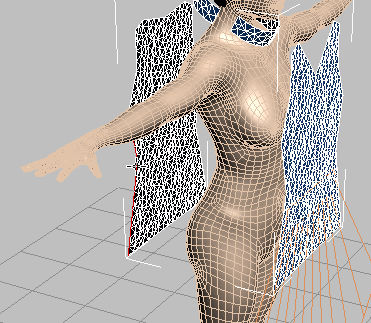
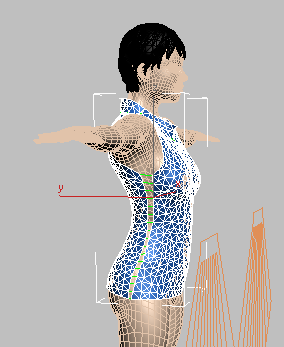
In shaded viewports, you can see that the pullover pattern now has a mesh.
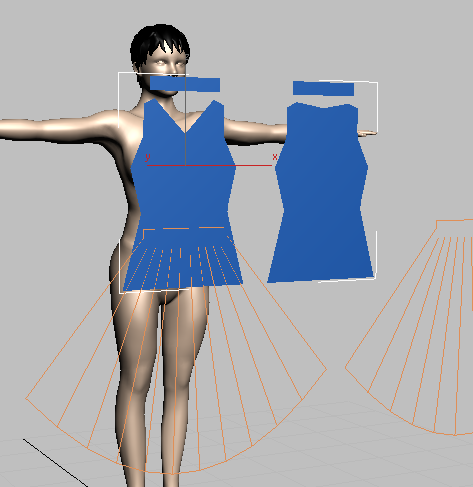
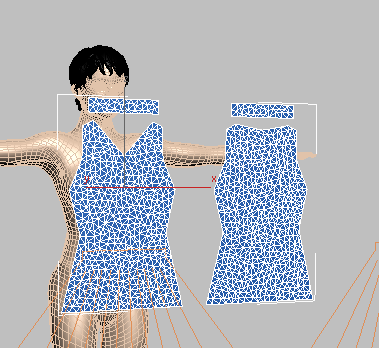
Garment Maker creates an irregular mesh. The mesh looks a bit odd, but it is good at deforming the way cloth deforms.
Move the pullover panels into position:
 (the plus-sign icon) to expand the Garment Maker modifier hierarchy, and then click the Panels level to make it active.
 (Select And Rotate), and then turn on
  (Angle Snap Toggle).
 select the right-hand portion of the pullover.
 Rotate the panels 180 degrees about their Y axis.
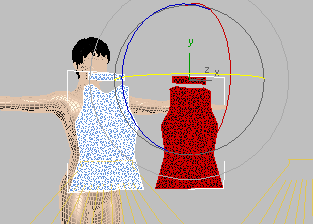
Garment Maker creates single-sided meshes, so you have to make sure that panels are oriented correctly.
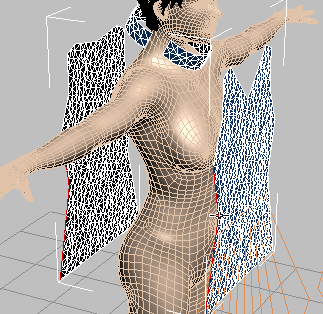
 Move the back panels along the X axis until the front and back are in the same X location, and them move them back along
the Y axis so the back panels are behind the model.
Move the back panels along the X axis until the front and back are in the same X location, and them move them back along
the Y axis so the back panels are behind the model. 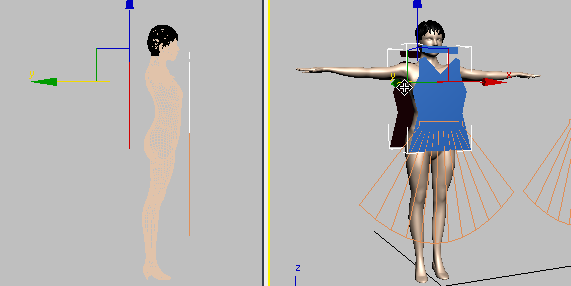
Improve the initial position of the collar:
The main panels of the pullover are parallel to each other, but we want the front of the collar to be lower than the back. Because of this, it helps to adjust the initial shape and position of the collar.
select just the front panel of the collar.
To see this effect, it might help to  orbit the active viewport.
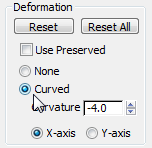
 Select the back panel of the collar, and set its deformation to Curved, with a value of –4.0 as well.
(The same value works for both panels, because of the one-sided orientation that panels have.)
Rotate the front panel of the collar up about 30 degrees in its Local X axis, and then rotate the back panel of the collar
down about –30 degrees, also in the X axis. 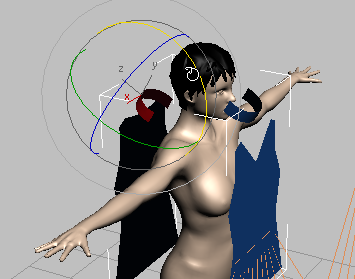 move the two collar panels so they are closer to the model, and so their edges line up.
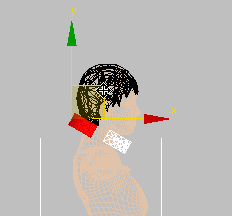
With this setup, it will be easier for the Cloth modifier to join the two halves of the collar.


To the Garment Maker modifier, a seam is a set of edges connected by unbroken vertices.
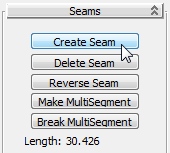
Garment Maker displays the seam as a set of lines connecting the two edges. The Garment Maker modifier does not change the position of the panels: You will use Cloth to accomplish that soon.
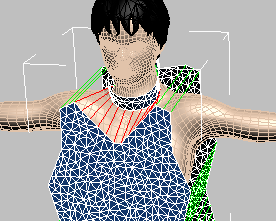
 Orbit the Perspective view, and create the corresponding three seams for the left side of the pullover.

Use the Cloth Modifier to Fit the Pullover
Apply the Cloth modifier to the pullover:


For the Cloth simulation to run correctly, you have to set some conditions in the Object Properties dialog.
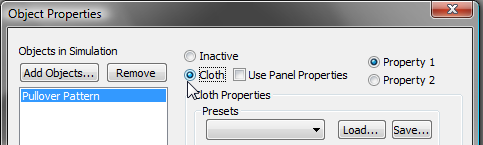
This tells Cloth to treat the (Garment-modified) Pullover Pattern as cloth.
When you choose Cloth, 3ds Max enables a variety of options. These settings are described in the 3ds Max help. Using them can be a matter of trial and error, but Cloth includes some useful presets: For the pullover, we will use a preset and adjust only one Cloth Properties setting.


3ds Max opens a Scene Explorer dialog. In the Scene Explorer, click to highlight the body object, and then click Add.

This tells Cloth to treat the body of the model as a solid object.

The lower the Offset value, the closer the simulated cloth will come to the collision object (in this case, the model herself). The new value ensures that the pullover will be form fitting.
Fit the pullover to the model’s torso:

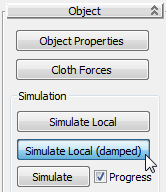
The Cloth modifier runs a simulation that animates over time. When the cloth is tightly fitted to the body, click Simulate Local (Damped) again to turn it off.
To fix this problem, go to the Simulation Parameters rollout. Turn off Use Sewing Springs.
The Cloth modifier runs further simulation, and closes the gap between panels.

Simulate Local (Damped) runs more slowly than Simulate Local: This can be an advantage when you are fitting garments. Sometimes the speed of Simulate Local can cause crumpled areas that don’t look good.
The Simulate button does generate animation: You will use this in a later section.

 undo the simulation and use Simulate Local (Damped).