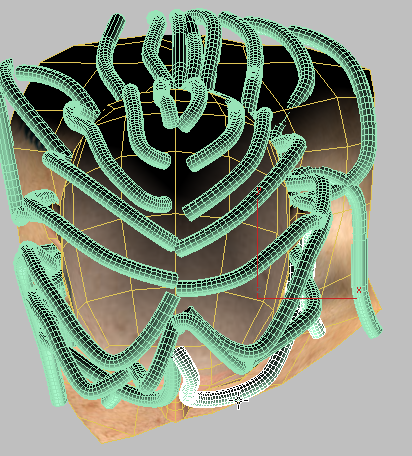
To create the hair for the top of the head, you will use a spline cage; this method helps to style a large amount of hair, especially long hair, all at once.

Spline cage for growing a head of hair
The spline cage method is somewhat different from the polygon method you used for the beard and mustache:
 open viking_02.max.
 select the Beard and Mustache objects (or use Select By Name). Then right-click, and from the Display (upper right) quadrant of the quad menu, choose Hide
Selection.
select the Beard and Mustache objects (or use Select By Name). Then right-click, and from the Display (upper right) quadrant of the quad menu, choose Hide
Selection.
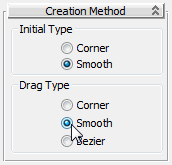
 Create panel, click
  (Shapes) to make it active, then on the Object Type rollout, click to turn on Line.
 (Snaps Toggle) to open the Grid And Snap Settings dialog. In the dialog, click Clear All, and then click to turn on Face.
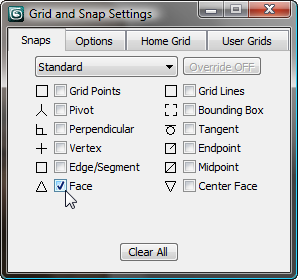 (3D Snaps Toggle) to turn it on.

This simply helps you see the splines better while you create them.
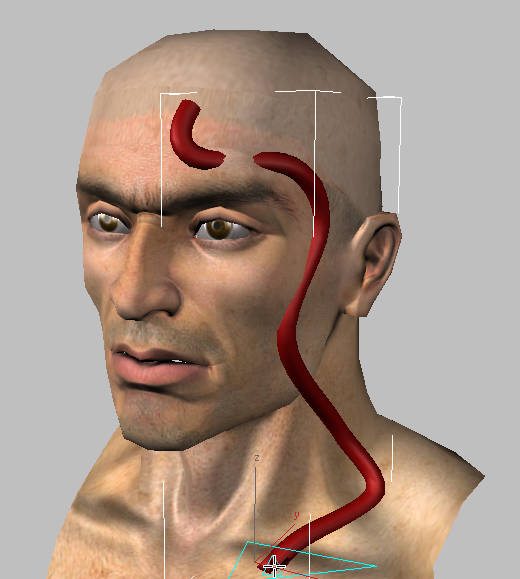
Because you are snapping to faces, some portions of the spline might sink below the skin. Don’t worry about this: You will move the splines away from the head before you generate the hair.
On each side of the head, there are three splines in front of the ear, and three behind the ear.
There are also two additional splines at the very back of the head.

 Orbit the viewport while you draw the splines (you can use Shift+Z later to undo the view changes).
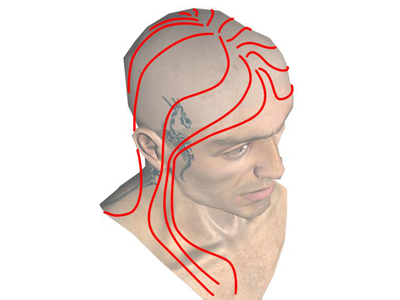
Assemble the splines into the cage:
select the first spline you created (at the front left temple). Right-click it, and from the Transform (lower right) quadrant
of the quad menu, choose Convert To:  Convert To Editable Spline.
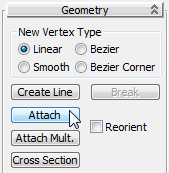
 Modify panel. With the first spline still selected, turn on the Geometry rollout Attach button and proceeding in a counterclockwise direction, click to attach each of the additional splines in the cage.
The order is important: If splines are out of order, the hair will be tangled or scrambled. Because of this, you can’t use the Attach Multiple button, either.
Move the cage away from the scalp:
Enable In Viewport.
 (Snaps Toggle), if it is still on.
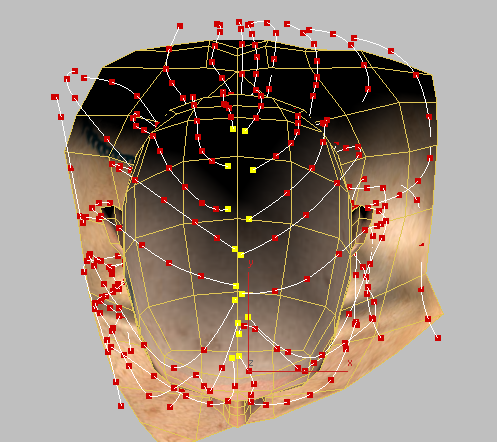
 (Vertex) to go to the Vertex sub-object level.
select all the first vertices of the hair splines (the ones that display in yellow, when they aren’t selected).
(Vertex) to go to the Vertex sub-object level.
select all the first vertices of the hair splines (the ones that display in yellow, when they aren’t selected).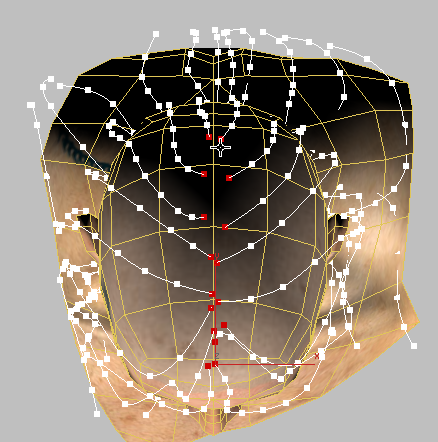
 (Select And Scale), choose
  (Use Selection Center), and then scale the vertices up a bit, so that all but the first, scalp vertices are at a distance
from the skin of the head.
(Use Selection Center), and then scale the vertices up a bit, so that all but the first, scalp vertices are at a distance
from the skin of the head.
 (Vertex) to exit this sub-object level.
 Application menu choose Import Merge. Open hair_spline_cage.max. In the Merge dialog, click the Hair_Cage object to highlight it, and then click OK.
 Select the spline cage.
Modify panel, from the Modifier list, choose WORLD-SPACE MODIFIERS Hair And Fur (WSM).
Select the spline cage.
Modify panel, from the Modifier list, choose WORLD-SPACE MODIFIERS Hair And Fur (WSM).
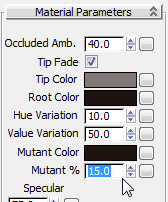
Notice that the default Hair Count is 450: This is far lower than the default for hair grown from polygons, and it is too low a value.

Hair Segments specifies how many segment subdivisions Hair And Fur uses for each hair. We increased this value because the Viking’s hair is long.
Hair Passes is a quality control: Increasing its value increases rendering time, but also improves the appearance of the hair.

This specifies that 20 percent of the hairs will have a random variation in their length.


Now you are ready to try rendering the hair.
 (Render Production).
Because the hair is longer, the head takes longer to render than the beard or mustache.
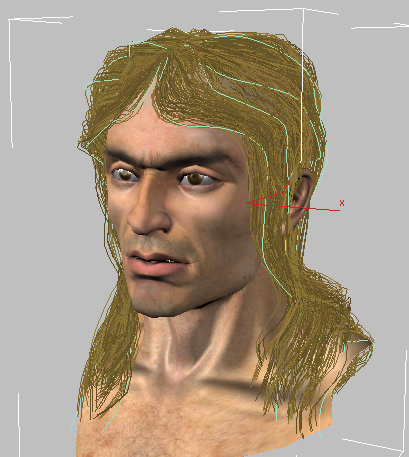
The result is not good: The hair looks matted and oily. In part, this is because the defaults for hair grown from splines differ from those for hair grown from polygons.

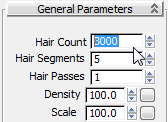
The default Root Thick(ness) for polygon hair is 5.0, while for spline hair it is 10.0!

In this case, the defaults are the same as for the beard and mustache, but the greater area of the head hair makes highlights more apparent.
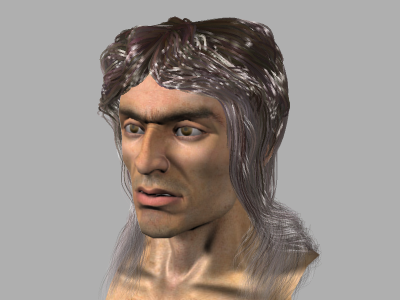
Render the head once more.
This time, the appearance of the head hair is more in keeping with the beard and mustache.
In this tutorial, you grew hair from polygons, and also from a spline cage. You used several of the numerous Hair And Fur settings to change the hair color and appearance and obtain a realistic result.


 Close the Grid And Snap Settings dialog.