The TurboSmooth modifier, like MeshSmooth, smoothes geometry in your scene.
The differences between the two are as follows:
TurboSmooth lets you subdivide the geometry while interpolating the angles of new faces at corners and edges, and apply a single smoothing group to all faces in the object. The effect of TurboSmooth is to round over corners and edges as if they had been filed or planed smooth. Use TurboSmooth parameters to control the size and number of new faces, and how they affect the surface of the object.
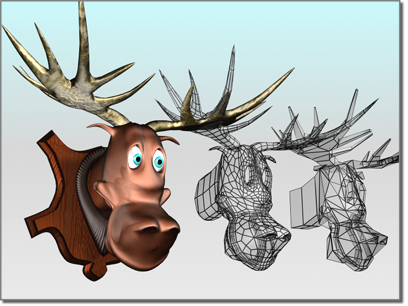
Angular model (shown on the right) changed to a smooth model with TurboSmooth
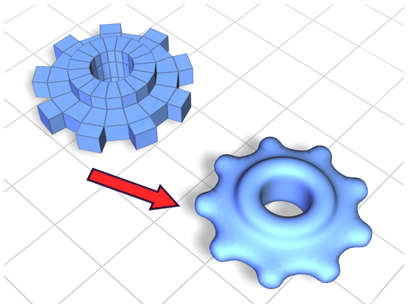
Smoothing an object modeled with extrusions
You use TurboSmooth to produce a Non-Uniform Rational MeshSmooth object (NURMS for short). A NURMS object is similar to a NURBS object in that you can set different weights for each control vertex.
TurboSmooth's effect is most dramatic on sharp corners and least visible on rounded surfaces. Use TurboSmooth on boxes and geometry with crisp angles. Avoid using it on spheres and similar objects.
To apply TurboSmooth to an object:
 Select an angular object.
 Apply the TurboSmooth modifier.
Example: To compare the speeds of TurboSmooth and MeshSmooth:
Apply MeshSmooth.
 Vertex sub-object level, and turn on
  (Show End Result On/Off Toggle).
 Move one of the corner vertices outward.
There is a significant delay before you see the result of the Move operation.
Move operations on vertices, observe the delays, and then undo (Ctrl+Z) repeatedly until the MeshSmooth modifier goes away.
Vertex sub-object level, and turn on (Show End Result On/Off Toggle).
Move one of the corner vertices outward.
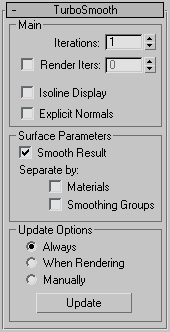
Lets you set the basic parameters for TurboSmooth.
Sets the number of times the mesh is subdivided. When you increase this value, each new iteration subdivides the mesh by creating smoothly interpolated vertices for every vertex, edge, and face from the iteration before. The modifier then subdivides the faces to use these new vertices. Default=1. Range=0 to 10.
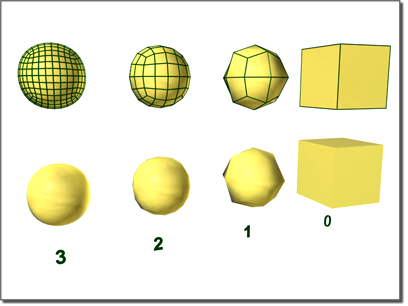
From right to left, effect of increasing the number of iterations
Lets you choose a different number of smoothing iterations to be applied to the object at render time. Turn on Render Iters, and then use the field to its right to set the number of render iterations.
When on, 3ds Max displays only isolines: the object's original edges, before smoothing. The benefit of using this option is a less cluttered display. When off, 3ds Max displays all faces added by TurboSmooth; thus, higher Iterations values result in a greater number of lines. Default=off.
Lets the TurboSmooth modifier compute normals for its output, which is faster than the standard method 3ds Max uses to compute normals from the mesh object's smoothing groups. Default=off.
Consequently, if the TurboSmooth result is used directly for display or rendering, it will generally be faster with this option turned on. Also, the quality of the normals will be slightly higher. However, if you apply any topology-affecting modifiers, such as Edit Mesh, above the TurboSmooth modifier, these normals will be lost and new ones computed, potentially affecting performance adversely. So it's important to remember to turn on Explicit Normals only if no modifiers change the object topology after TurboSmooth takes effect.
Lets you apply smoothing groups to the object and restrict the smoothing effect by surface properties.


