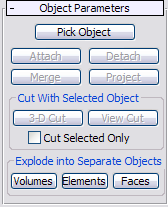
The Object Parameters rollout controls let you combine and separate Body Objects while maintaining the solid-geometry format. Also available here are commands for subdividing objects, splitting faces, and performing simple Boolean operations. For example, you can position a spline curve over an object and then use the curve to cut through the entire object or selected faces in the view direction, thus subdividing the faces.
To use the Object Parameters controls:
Using the Object Parameters rollout tools to combine a Body Object (the “source”) with another object (the “target”) follows a slightly different procedure than does attaching with other object types in 3ds Max. This applies to all operations exept Detach.

Cut With Selected Object group
Cuts theBody Object with a 3D object. This produces new edges corresponding to the intersection of the object with the Body Object geometry. After cutting, the cutter object is deleted.
To use, position the objects so the 3D object intersects the body Object where you want to create new faces, click Pick Object, select the 3D object, and then click 3-D Cut. The cut is performed and the cutting object is deleted.

Left: Body Object (box) with intersecting cylinder
Right: After using 3-D Cut, new edges and faces appear where the cylinder intersected the box.
Cuts the Body Object using a profile projected parallel to the current active view direction. Typically the profile is a spline curve or NURBS curve.
To use, position the objects so the profile is superimposed over the Body Object to cut in the active viewport, click Pick Object, select the profile, and then click View Cut. The cut is performed and the profile is deleted.
The following illustration shows two boxes, converted to Body Objects, after using View Cut with two elliptical splines. The position of each spline with respect to its box was the same, but the pairs were rotated differently, so the results are different.

Left: The spline was aligned with the box surface and the viewpoint.
Right: The spline was offset with respect to the axis between the box surface and the viewpoint.