Volume Light provides light effects based on the interaction of lights with atmosphere (fog, smoke, and so on).

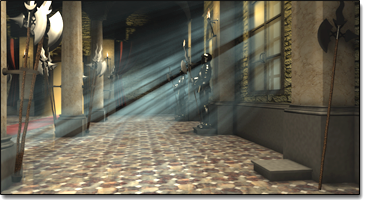
Volumetric light used in a complex environment with shadows and noise.
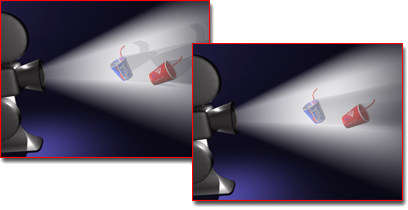
This plug-in provides effects such as radial glows for omni lights, conical glows for spotlights, and parallel beams of fog for directional lights. Objects within the light volume can cast shadows within the spotlight's cone, if using shadow maps as a shadow generator.

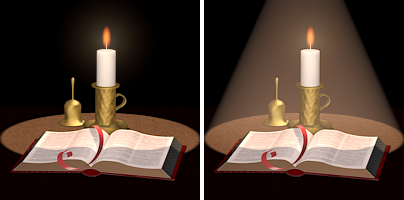
A simplified example where the light cone is clearly visible on the right.
Volume Light renders only in Camera and Perspective views. Orthographic or User views don’t render Volume Light effects.
 Environment.
You can also use the Pick Object dialog to select multiple lights from a list. Click Pick Light, and then press H to open the dialog.
To remove a light from the list:
To assign volume light to a light through the Modify panel:
 Modify panel of a light.

The Volume Light Parameters rollout appears when you select Volume Light under Effects in the Environment dialog. It has the following controls.
Sets the color for the fog that makes up the volume of the light. Click the color swatch, and then choose the color you want in the Color Selector.
You can animate the color effect by changing the fog color at a nonzero frame with the Auto Key button on.
Unlike the other fog effects, this fog color combines with the color of the light. Possibly the best effect is to use white fog and then color it with a colored light.
Attenuates volume light over distance. The volume light ramps from the Fog Color to the Attenuation color over the light's Near and Far attenuation distances. Clicking the color swatch displays a color selector so you can change the attenuation color.
Attenuation Color interacts with Fog Color. For example, if your fog color is red and your attenuation color is green, in the rendering your fog will shade to purple. Typically the attenuation color should be very dark and neutral—black is a good choice.
Similar to an ambient light setting. If Min Light% is greater than 0, areas outside the light volume will glow also. Note that this means areas of open space (where the light ray can travel forever) will end up the same as the fog color (just as with normal fog).
Without objects behind the fog, the scene will always be as bright as the fog color if the Min Light% is greater than 0 (no matter what the actual value is). This is because the fog goes to infinity and is accumulated infinitely. If you're going to use min light% values greater than 0, you should make sure that you enclose your scene by geometry.
The image buffer is not filtered but directly sampled instead. This option is fine for 8-bit images, AVI files, and so on.
Controls the Sample Volume % parameter automatically and disables the spinner (this is the default). The preset sampling rates are as follows:
Because the parameter ranges up to 100 there's still room to set it higher. Increasing the Sample Volume % parameter definitely slows things down, but in some cases you may want to increase it (for extremely high sample quality).

Left: Original scene
Right: Increasing sample volume to improve quality
The controls in this section are contingent upon the settings of the Start Range and End Range attenuation parameters for the individual light.
Sets the start attenuation of the light effect, relative to the actual light parameter's attenuation. It defaults to 100 percent, which means that it starts attenuating at the Start Range point. When you reduce this parameter, it starts attenuating the light at a reduced percentage of the actual Start Range value that is, closer to the light itself.
Because you usually want a smooth falloff, you can keep this value at 0, and no matter what the light's actual Start Range, you'll always get a smooth glow without hotspots.
Sets the end attenuation of the lighting effect, relative to the actual light parameter's attenuation. By setting this lower than 100 percent, you can have a glowing attenuating light that casts light much farther than it actually glows. Default=100.

Left: Original scene
Right: Attenuation limits the range of the light.
Links the noise effect to its light object, rather than to world coordinates.
Usually you want noise to look like fog or dust motes in the atmosphere, in which case, as the light moves, the noise should remain with the world coordinates. For certain special effects, however, you might want the noise linked to the light's coordinates. In these cases, turn on Link to Light.
Limits the noise effect. When the noise value is above the Low threshold and below the High threshold, the dynamic range stretches to fill 0-1. This makes for a smaller discontinuity (first order instead of 0 order) at the threshold transition and thus produces less potential aliasing.
Acts like a high-pass filter: the smaller the value, the more the volume is transparent with discrete blobs of smoke. By around -0.3 or so your image begins to look like specks of dust. Because the fog becomes thinner as this parameter gets smaller, you'll probably need to increase the density or the volume will start to disappear. Range=-1 to 1
Controls the speed of the wind. If you have Wind Strength also set to greater than 0, the fog volume animates in accordance with the wind direction. With no Wind Strength, the fog churns in place. Because there's an animation track for phase, you can use the Function Curve editor to define precisely how you want your wind "gusts" to happen.