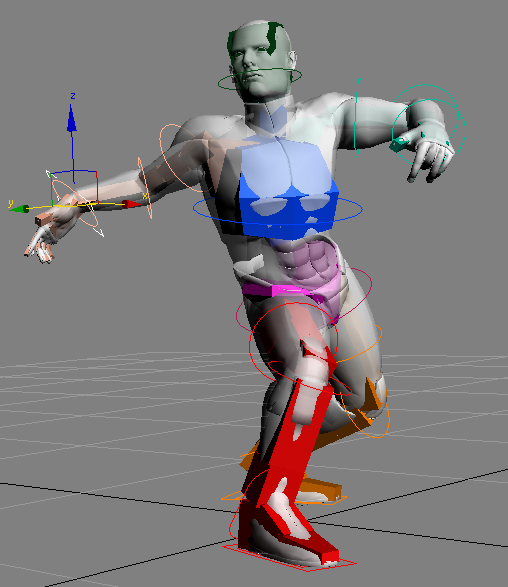
Manipulation gizmos provide a cleaner interface for working with your character. Often the CATBones are hidden under the skin mesh, so selecting and editing the bones can be difficult. The gizmo, which can be any of five different spline shapes (or a custom object), surrounds the bone so it’s easier to grab for applying transforms interactively.

Once you apply a gizmo to a CATRig part, selecting the gizmo provides access to the same interface elements as selecting the body part itself. Similarly, keyframes from animating the CATRig show up on the track bar when you select the gizmo. Even MAXScript calls work on the gizmo. When you right-click a gizmo, you get the same right-click menus as with the CATBone.
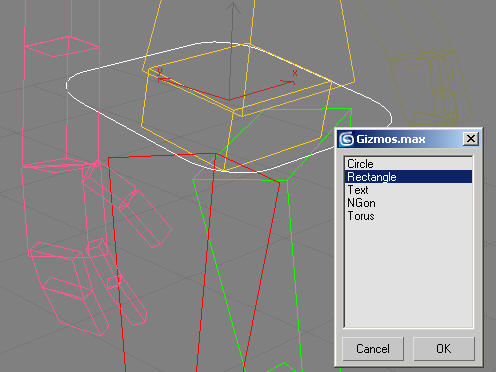
When the CATRig is in Setup mode and you right-click on any CATBone, the Tools2 quadrant includes the Add Gizmo command.

Choosing Add Gizmo opens a dialog with a list of preset gizmo shapes.

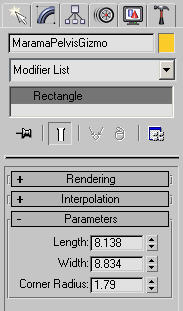
You can edit the gizmo settings to fit the size and shape of your character skin mesh. To do so, select the gizmo and go to the Modify panel. These settings are the same as for the equivalent spline objects in 3ds Max; see the main help for details.

As you modify the spline settings, the changes appear immediately in the viewports.
In some cases it can actually be useful to link gizmos together. You can create hierarchies of gizmos that help you to navigate the rig, rather than use the actual hierarchies of the CATRig. For example, you could link the ribcage gizmo directly to the pelvis gizmo and then navigate the rig rapidly with the Page Up and Page Down keys.
If you open this file, you can see the shape objects that comprise the list. To add to the list of predefined gizmo shapes, add your own gizmos to this file and resave it. You can use any type of object as a gizmo.