 Command entry:
Select a shape.


Modify panel

Modifier List

Lathe
 Command entry:
Select a shape.

Modifiers menu

Patch/Spline Editing

Lathe
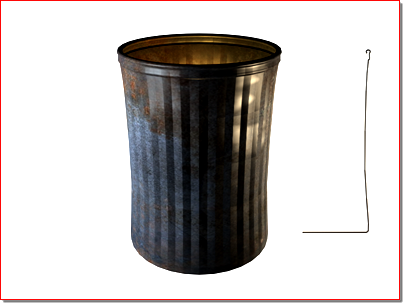
Lathe creates a 3D object by rotating a shape or NURBS curve about an axis.
Interface
Modifier Stack
- Axis
-
At this sub-object level, you can transform and animate the axis of revolution.
For more information on the stack display, see Modifier Stack.
Parameters rollout
- Degrees
-
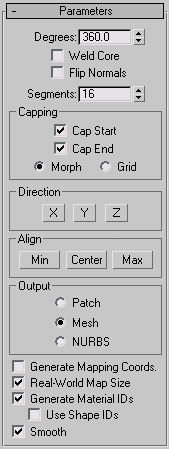
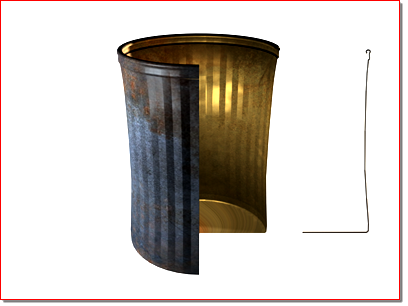
Determines the number of degrees that the object is spun around the axis of revolution (0 to 360, default=360). You can set
keyframes for Degrees to animate the circular growth of a lathed object. The Lathe axis auto-sizes itself to the height of
the shape being lathed.
- Weld Core
-
Simplifies the mesh by welding together vertices that lie on the axis of revolution. Keep it turned off if you intend to create
morph targets.
- Flip Normals
-
Depending on the direction of the vertices on your shape, and the direction of rotation, the lathed object might be inside
out. Toggle the Flip Normals check box to fix this.
- Segments
-
Determines how many interpolated segments are created in the surface between the start and endpoint. This parameter is also
animatable. Default=16
Note You can create up to 10,000 segments using the segments spinner. Try not to create geometry that is more complex than you
need. Often you can get satisfactory results by using smoothing groups or smoothing modifiers, rather than increasing segmentation.
Capping group
Controls whether or not caps are created for the interior of the lathed object if Degrees is set to less than 360.
- Cap Start
-
Caps the start of the lathed object with Degrees set to less than 360 and a closed shape.
- Cap End
-
Caps the end of the lathed object with Degrees set to less than 360 and a closed shape.
- Morph
-
Arranges cap faces in a predictable, repeatable pattern necessary for creating morph targets. Morph capping can generate long,
thin faces that don't render or deform as well as grid capping. Use morph capping primarily if you are lathing multiple morph
targets.
- Grid
-
Arranges cap faces in a square grid trimmed at the shape boundaries. This method produces a surface of evenly sized faces
that can easily be deformed by other modifiers.
Direction group
Sets up the direction of the axis of revolution, relative to the pivot point of the object.
- X/Y/Z
-
Set the direction of the axis of revolution relative to the pivot point of the object.
Align group
- Min/Center/Max
-
Align the axis of revolution to the minimum, center, or maximum extents of the shape.
Output group
- Patch
-
- Mesh
-
- NURBS
-
- Generate Mapping Coordinates
-
Applies mapping coordinates to the lathed object. When Degrees is less than 360, and Generate Mapping Coordinates is turned
on, additional mapping coordinates are applied to the end caps, placing a 1 x 1 tile on each cap.
- Real-World Map Size
-
Controls the scaling method used for texture mapped materials that are applied to the object. The scaling values are controlled
by the Use Real-World Scale settings found in the applied material's Coordinates rollout. Default=on.
- Generate Material IDs
-
Assigns different material IDs to the sides and the caps of the lathed object. Specifically, the sides receive ID 3, and the
caps (when Degrees is less than 360 and the lathed shape is closed) receive IDs 1 and 2. Default=on.
- Use Shape IDs
-
Uses the material ID values assigned to segments in the spline you lathed, or curve sub-objects in the NURBS curve you lathed. Use Shape IDs is available only when Generate Material IDs is turned on.
- Smooth
-
Applies smoothing to the lathed shape.


