


At some point you might need to use the File  Merge command to merge a character into your scene. Also, you can use Merge to clone a biped that has a mesh with the Physique
modifier applied, as described in this topic.
Merge command to merge a character into your scene. Also, you can use Merge to clone a biped that has a mesh with the Physique
modifier applied, as described in this topic.
To clone a character (that is, a biped with a Physique mesh), save a scene that contains the character, change the original
biped's name, and then use File Merge to merge the copy from the saved file. You can merge from a saved version of the scene that is currently open. See
the procedures for details.
 select the conflicting biped, go to the
  Motion panel, and use the Structure rollout's Root Name field to change the biped's root name.
If you skip this step, you will get a Duplicate Name dialog for every object in the merged biped's hierarchy!
Merge, then choose the MAX file that contains the biped to import.
The default name for the biped center of mass is Bip001. If the biped was renamed on the Structure rollout, find the renamed center of mass in the list.
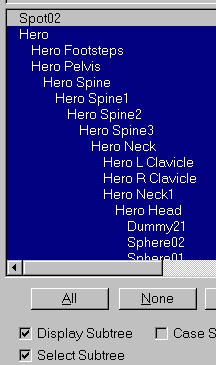
Selecting a biped while merging a MAX scene
In the illustration, the center of mass object is named Hero . With Select Subtree active, all the children are also selected when you click Hero, including the Physique mesh.
Probably a Duplicate Name dialog is displayed. If it isn't, the merge is done; if it is, see the following step.
To hide the finger, toe, and head dummy objects:
The dummy objects for fingers, toes, and the head are visible on the newly merged biped. Usually these dummies are hidden from sight. They are used by Physique to create envelopes for all the finger tips, toe tips, and head; these dummies display when a character is merged. The quickest way to hide them again is simply to toggle the Objects button in the Biped rollout's Display group, as described in these steps.
Motion panel.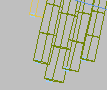
Fingertip dummies displayed as blue cubes
The number of biped dummies varies according to how many fingers and toes the character has.

(If the rollout is already expanded, the bar shows a minus sign at the left, instead of a plus.)
 (Objects) off and then back on again to hide the biped finger/toe/head dummy objects.
The original biped, with its Physique modifier, is cloned. It appears in the same location as the original biped.
Motion panel Biped rollout, turn on  (Move All Mode).
 (Select And Move) to move the clone to a new location in the scene.