The main ProOptimizer modifier controls are on the Optimization Level rollout.
To initialize ProOptimizer, click Calculate. You can then adjust the optimization level interactively. You choose the level of optimization either by setting the percent of vertices to preserve (Vertex %), or by setting an explicit count of vertices to preserve (Vertex Count).

Additional rollouts contain options that let you control how the model is optimized, and what kind of information to retain or discard. These options are not interactive. If you adjust their settings after an initial optimization, you must click Calculate once again to see the effects.
To use the ProOptimizer modifier, follow these steps for most situations:
 Select the object or objects you want to optimize.
 Modify panel and apply the ProOptimizer modifier.
This initializes ProOptimizer and lets you interactively adjust the optimization level.
This creates an Editable Mesh object with an optimized number of faces.
Directly sets the number of vertices in the optimized object.
This control is unavailable before you click Calculate. After you click Calculate, this value is set to the number of vertices in the original object (because Vertex % defaults to 100). Once this control is available, you can adjust the Vertex Count value interactively.
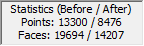
This text window shows the ProOptimizer status. Before you click Calculate, it displays “Modifier Ready.” After you click Calculate and adjust the optimization level, it displays statistics that describe the effect of the operation: “before” and “after” vertex and face counts.
If, after a calculation, you change a setting in the one of the Options rollouts, the text changes to “Optimization Invalid.” You must click Calculate again to see the results of changing the options.
The optimization can also become invalid if you move the ProOptimizer modifier location on the stack, or change topology on the stack below the ProOptimizer modifier.
If you press Esc to cancel an optimization, this window displays “Optimization Cancelled.”


