To create the revolving door, you will rotate the right enclosure panel temporarily into a different position, then you will create a pivot door using snaps between the hub and the right enclosure panels. You edit the material on the door, then instance the door to create a wheel of four doors.
 open add_door.max in the \startup folder.
 Select the right enclosure panels object in the viewport.
 (Select And Rotate), and then move your mouse over the Transform gizmo tripod in the viewport. When the Z axis (the horizontal
blue circle) is highlighted, click and drag to rotate the right enclosure panels object 45 degrees about the Z axis until it touches the left enclosure panels object, as shown below.
(Select And Rotate), and then move your mouse over the Transform gizmo tripod in the viewport. When the Z axis (the horizontal
blue circle) is highlighted, click and drag to rotate the right enclosure panels object 45 degrees about the Z axis until it touches the left enclosure panels object, as shown below.
As you rotate, you can see the rotation amount in yellow text in the viewport, just over the transform gizmo. To get the desired result, it should read (0.00, 0.00, 45.00).
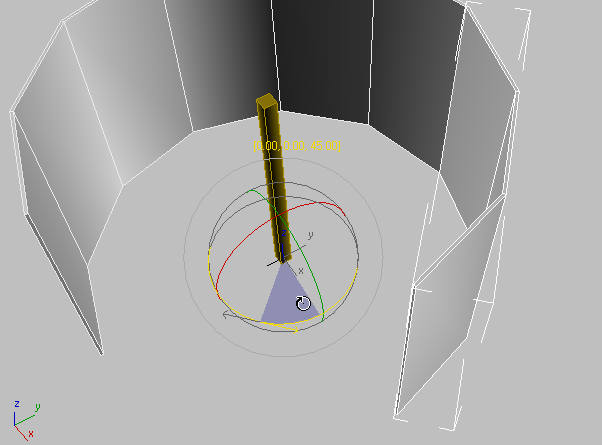
Rotate the right enclosure.
This rotation is temporary, for the purpose of modeling only.
 (Create New Layer).
The Doors layer is now visible in the Layer Properties field on the Layers toolbar.

 Grids And Snaps Grid And Snap Settings.
 Close the dialog.
On the main toolbar, the 3D Snap button highlights.

 Create panel, click the arrow on the drop-down list and choose Doors. On the Object Type rollout, click Pivot.
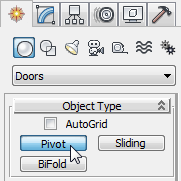
On the Create panel, the Pivot button highlights, and the pivot door Parameters rollouts appear.
To create a door, you use the mouse in three distinct steps:
You can see the snap icon that follows the edges of the cylinder as you move.

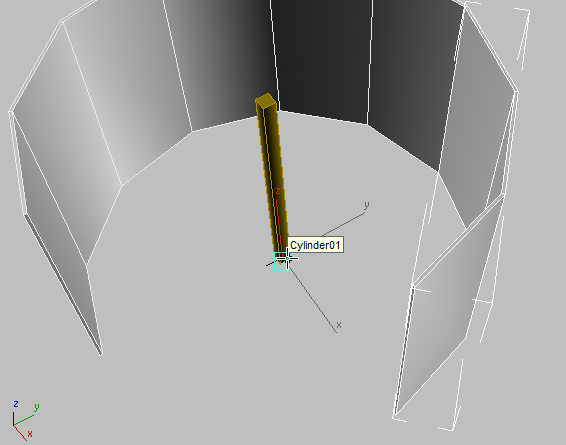

Snap to the right enclosure.
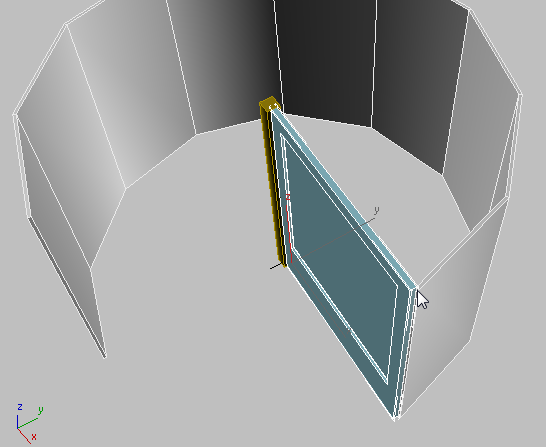
Set the Height last.
Immediately after clicking to set the height, make the following parameter adjustments, watching the effects in the viewport. You can adjust these parameters at any time in the future using the Modify panel.

 Select the right enclosure panels object: the one you rotated earlier in this lesson.
 Rotate the sliced tube back into place; that is, –45 degrees on the Z axis.
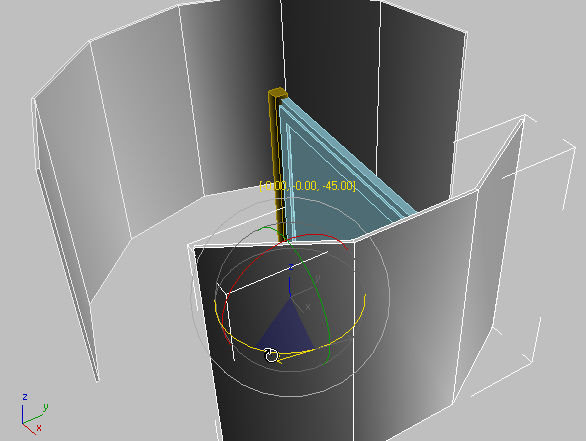

Check the door position and rotation, and correct them if you need to:
 Zoom in so you can see the base of the cylinder and the door.
(Select And Rotate), click the door object, and then on the status bar, set the Z coordinate to 0.0 (right-click the spinner arrows to reset to zero).
Zoom in so you can see the base of the cylinder and the door.
(Select And Rotate), click the door object, and then on the status bar, set the Z coordinate to 0.0 (right-click the spinner arrows to reset to zero).
 move the pivot door so it is centered on the edge of the hub, as illustrated.
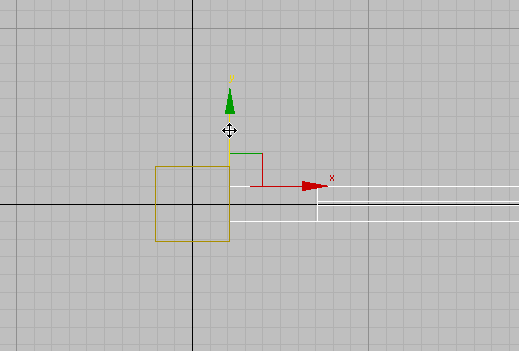
You'll use a Lattice modifier to add struts to the enclosure. The glass panels will be held up by stout uprights that you will create next.
 (Select Objects In Current Layer).
This selects both enclosure objects and deselects any other objects.
Clone.
Copy, and click OK.
3ds Max Design makes copies of the two enclosure objects and selects the copies.
Parametric Deformers Lattice.
3ds Max Design applies the Lattice modifier to the enclosures.
Geometry group, choose Struts Only From Edges.
The right and left enclosure panels now are held up by struts.
Struts group, turn on End Caps. 
One of the objects with the Lattice modifier is named left enclosure panel001, and the other is named right enclosure panel001. You'll rename both now.
Next you'll create, apply, and edit materials for the revolving door.


 Modify panel, reduce its width so it fits within the space properly.