Using the Cylinder object, you will create a central pole that will act as the hub for the revolving door. First you will create a new layer for the revolving door.
 (Open File), navigate to the the startup folder, and open revolving_door_hub.max.
The scene revolving_door_hub.max is an empty scene with the units already set up.
If you do start with this file, make sure that snaps are set up as described in the previous lesson. (Snap settings are not saved with a scene, though 3ds Max Design does remember them from session to session.)
You can use the layer-management system for display and rendering purposes. Here you will create a new layer for the revolving door.

 (Create New Layer).
This creates a new layer and opens the Create New Layer dialog.

The Revolving door layer is now current and visible in the Layers toolbar. Whatever you create now will be on this layer.
Before creating the hub, you will adjust your viewport so you have a better view of the objects you will make.
 (Orbit). In the Perspective viewport, drag within the navigation orb to change the view of the home grid so you have a view
that is closer to ground level. When you are done, right-click the viewport to turn off Orbit.
(Orbit). In the Perspective viewport, drag within the navigation orb to change the view of the home grid so you have a view
that is closer to ground level. When you are done, right-click the viewport to turn off Orbit. 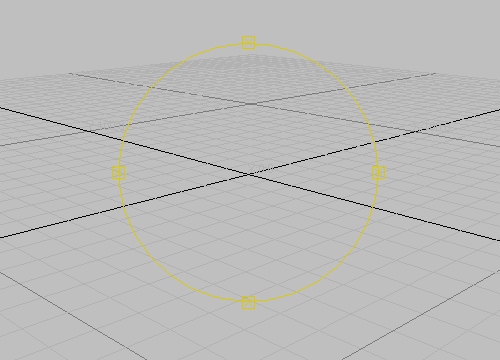
Orbit navigation orb
 (3D Snap Toggle) to turn it on.
 Create panel, click
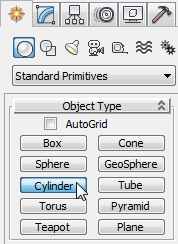
  (Geometry). Make sure Standard Primitives is chosen in the drop-down list, then on the Object Type rollout, click Cylinder.
The Cylinder button highlights to indicate it is active and ready for use.
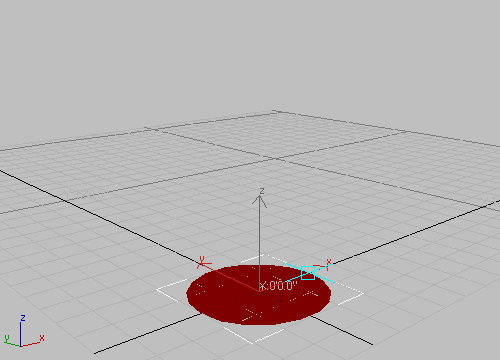
The cursor displays a snap icon and jumps to the grid points.

As you move the mouse away from the center, a flat shaded circle grows from your cursor. You are defining the radius of the cylinder as you move the mouse.
Notice that as you move away from the center of the grid the mouse will snap to grid points.
The snap has been turned off, while you are still in the middle of creating the cylinder. Now as you move your mouse, you are free from the snap control.
Make the cylinder any size you like. You're going to change the size in the next step.
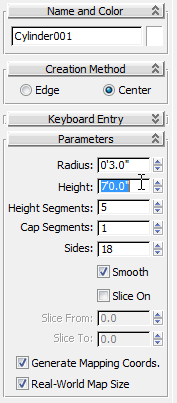
Immediately after creating an object, you can modify its parameters such as size and shape by changing these values on the Parameters rollout on the Create panel.
 Modify panel and adjust the parameters there, or you can simply
  undo the new object (Ctrl+Z) and start over.
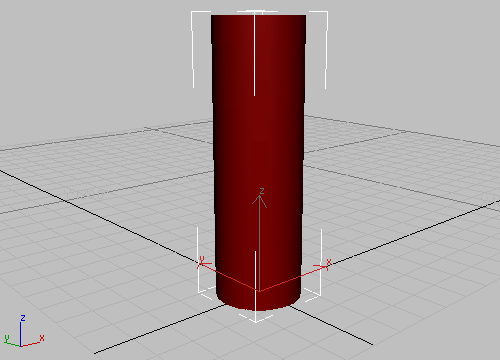
 (Zoom Extents).
The viewport zooms so you can see the entire cylinder.
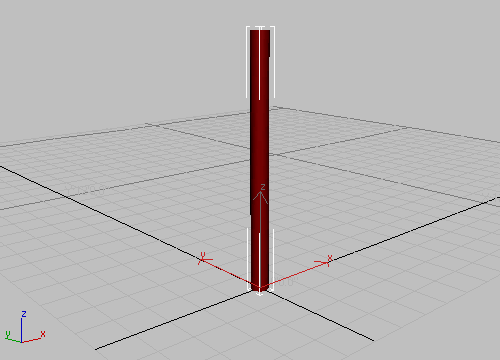
Zoom extents to see it all
The Edged Faces option lets you see the edges that 3ds Max Design uses to create the surfaces of your model.
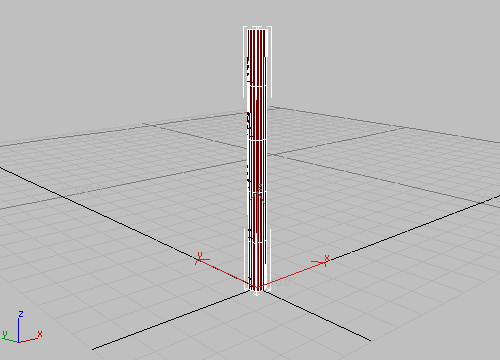
Edged faces show the underlying geometry

The Cylinder changes into a tall box with four sides; this will make it easier to create the door. Later you'll change the pole back to a cylinder.

Reduce the segments
Next you'll rotate the cylinder so the four sides line up with the grid.
 (Zoom) in the viewport navigation controls, then drag the mouse to Zoom in so you can see the bottom of the cylinder up close.
Use Orbit to rotate the view if you like.
(Zoom) in the viewport navigation controls, then drag the mouse to Zoom in so you can see the bottom of the cylinder up close.
Use Orbit to rotate the view if you like. 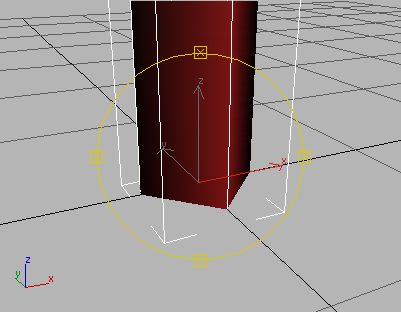
Zoom in and rotate the view.
 (Select And Rotate).
The transform gizmo appears in the viewport.
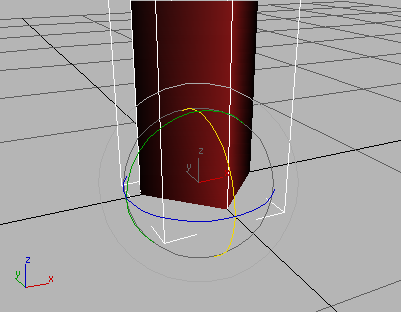

The cylinder rotates around the Z axis so the sides line up with the grid.

Cylinder rotated
This will be the pole that revolves to turn the revolving door. You'll snap to its sides when you create an initial Pivot door object. After the other doors are cloned, you can increase the number of sides so it will look like a cylinder again.
Next you will create a tube object to make the door enclosure.
 Application menu, choose Save As, and save your scene as my_revolving_door_hub.max.


